How to photograph the stars
You have always wanted to photograph the milky way, but only a few points are visible on your photos? Then this is the right place for you. In this article you will learn how to photograph and edit your images of the stars so that the entire milky way appears in the photo.
To photograph stars you need a camera on which you can set all settings manually. In addition, you need a tripod. To get the best out of your pictures, you might want to use an image editing program.
The most important things you need to know when taking pictures of stars or the milky way are:
- Stars are best photographed at new moon.
- Exposure time should be as long as possible (until the stars become elliptical).
- A tripod is absolutely necessary for photographing the milky way.
- By stacking several images on top of each other the noise can be reduced.
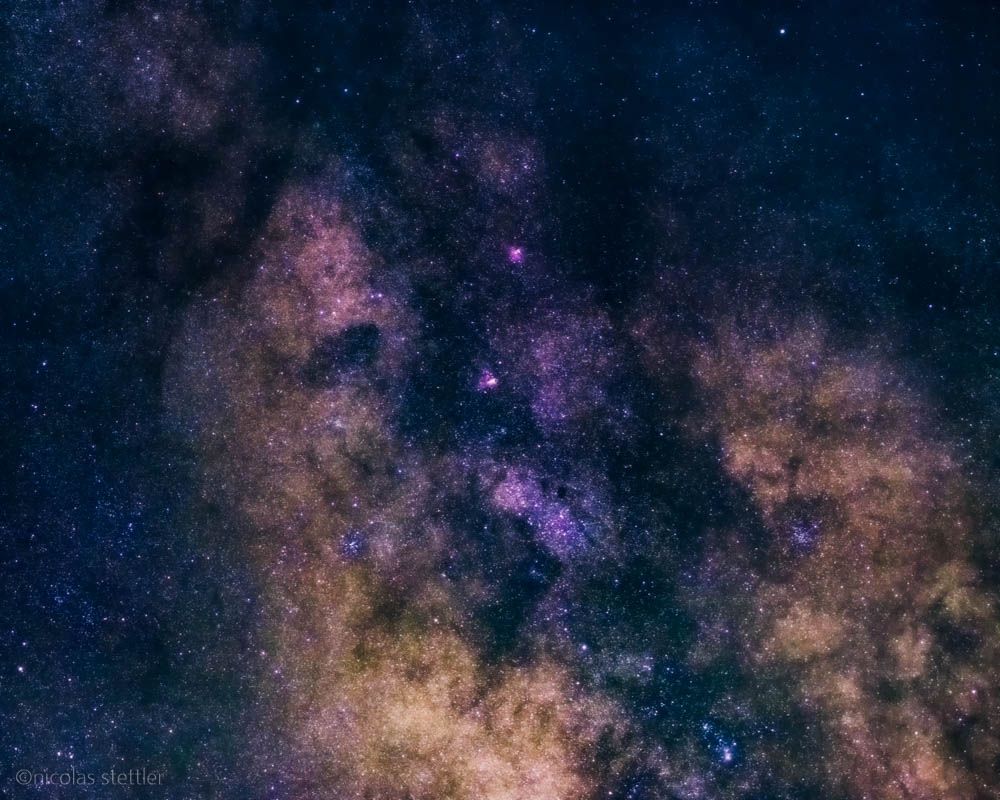
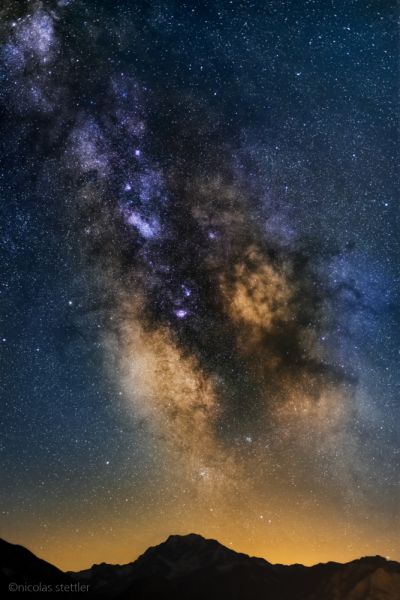
During the summer vacations I dedicated myself to the animals and also to landscapes of the swiss alps. Besides the sunsets I also tried to take pictures of the landscape under the starry sky. When I published the photos on Instagram in the Stories, I was asked several times how I edited the photos. In this article I will now show you how you can edit the milky way in the same way.
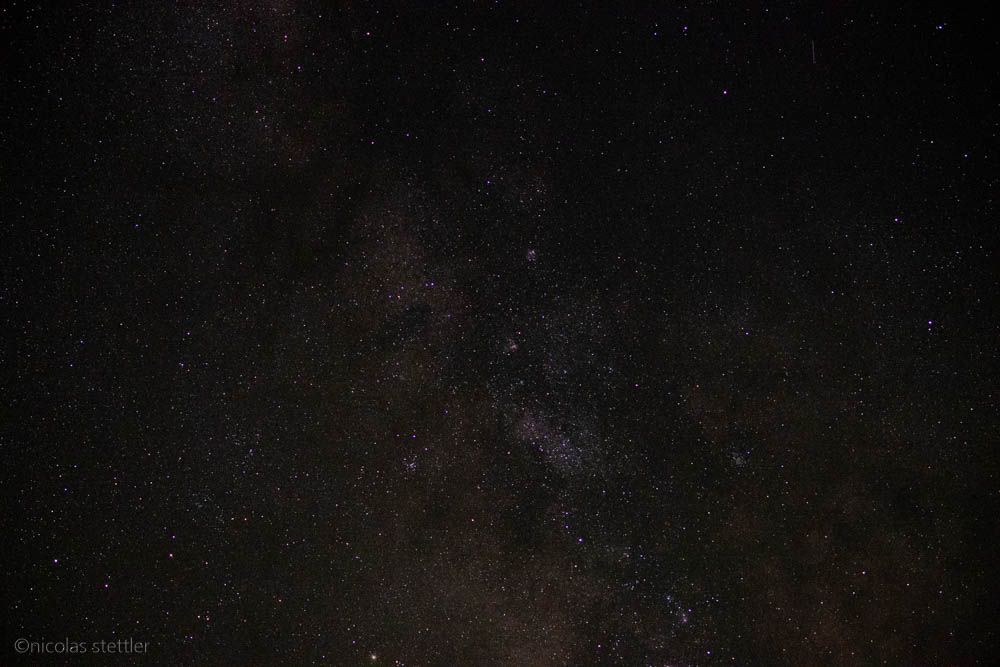
The photo I show you today was taken on a trip to the swiss alps. There I photographed marmots and bearded vultures as well as the milky way.
Unfortunately the moon phase was anything but optimal. Only a short window per night remained in which it was completely dark. With longer exposures, the moonlight is sufficient, to interfere with the the stars and they disappear from the sky. Furthermore the accommodation was located in the middle of the city. This created even more light pollution. Fortunately I found a bridge, which was relatively well shielded from disturbing light sources. One evening the weather finally joined in as well and it was practically cloudless.
The darker the night, the better the stars come out. Besides the moon, larger cities also lead to less optimal conditions. Light from cities is also called light pollution.
Because I already thought about which composition would work best during the day, I knew roughly how to set up the camera. The compositions were also quite limited by the position of the milky way.
Before I decided on a first definitive composition, I already focused the lens. For this I used Jupiter which shone quite brightly in the sky. So I turned the lens until Jupiter appeared as small as possible on the Live View. After focusing on a bright star or a planet you should deactivate the autofocus. Especially with Nikon cameras you should pay attention to this. In Nikon cameras, the autofocus is activated during time-lapse photography. In the dark, however, the AF does not focus properly and the image becomes blurred. But if you deactivate the autofocus on the lens or on the camera, this will not happen.
To focus on the stars you should aim at a bright star/planet. With the Live View you can then adjust the focus manually until the star/planet appears as small as possible.
So now that the focus was set correctly, I looked for a first composition. After I found a promising composition, I took some test photos to make the right settings. To find the right settings there are some rules of thumb. For example there is the rule of thumb:
500/ focal length= exposure time
This calculated time indicates the maximum exposure time with which the stars are imaged as a dot. With longer exposure times the stars shift too much due to the rotation of the earth and become ellipses and finally lines.
The aperture is very dependent on the lens. I used a 80-400 mm f/ 4.5-5.6 from Nikon. To get as much light as possible I set the aperture at 80mm to f/ 4.5. Had I had a faster lens with me, I would have opened the aperture a bit more. But the open aperture can cause aberrations and vignetting. Especially the aberration is practically impossible to correct afterwards. Therefore I would never open the aperture completely.
Aberration occurs mainly in the image corners as distortions and blurring. By stopping down you can reduce aberrations.
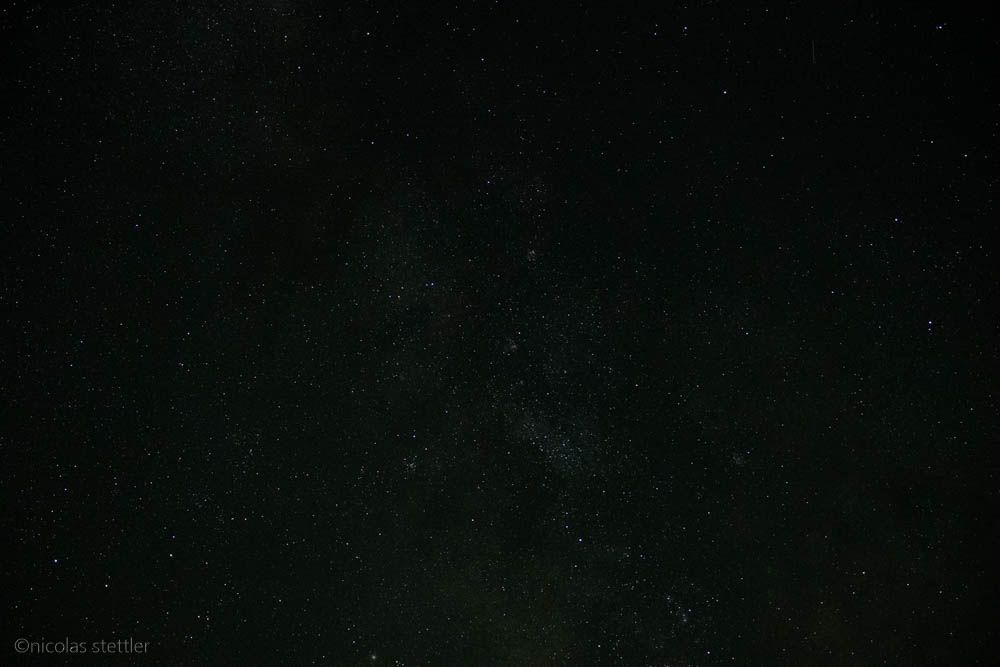
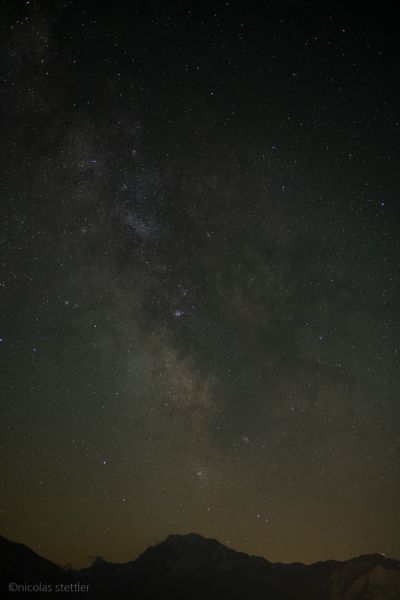
I then adjusted the ISO to create the brightest possible image. Important: I made the mistake of setting the screen a bit too bright. At night the photos seemed to be exposed just right. Only on the computer I noticed that the pictures were a bit too dark. To control the brightness you should always check the histogram!
Check your photos not only with the screen, but also with the histogram. At night the pictures appear very bright on the display.
To be able to see anything at all on the pictures, you will need very high ISO values. This means very high noise levels. To fight this noise you can take several pictures and then stitch them together. The computer will then calculate the average value of all the photos taken for each pixel.
But because the stars are moving, this method does not work. Therefore you need special programs which can compensate the rotation of the earth. These programs recognize how much the stars move and then stack the images. More about these programs will follow later.
To take the pictures I use the time-lapse function of my camera. So I set the camera to take 15 pictures every few seconds. Since I still take pictures with a DSLR, I also set a mirror lock-up of 3 seconds. This way the mirror is raised a few seconds before the actual one and I avoid that small vibrations of the mirror could influence the photo. All I then had to do was press Start and wait until the camera had taken all the pictures.
Before you go home I recommend you to check the pictures and try other compositions or lenses if necessary. For example, I mounted my 50mm f/ 1.8 and took some other images. For example I also photographed a section of the milky way with foreground.
Edit the star images
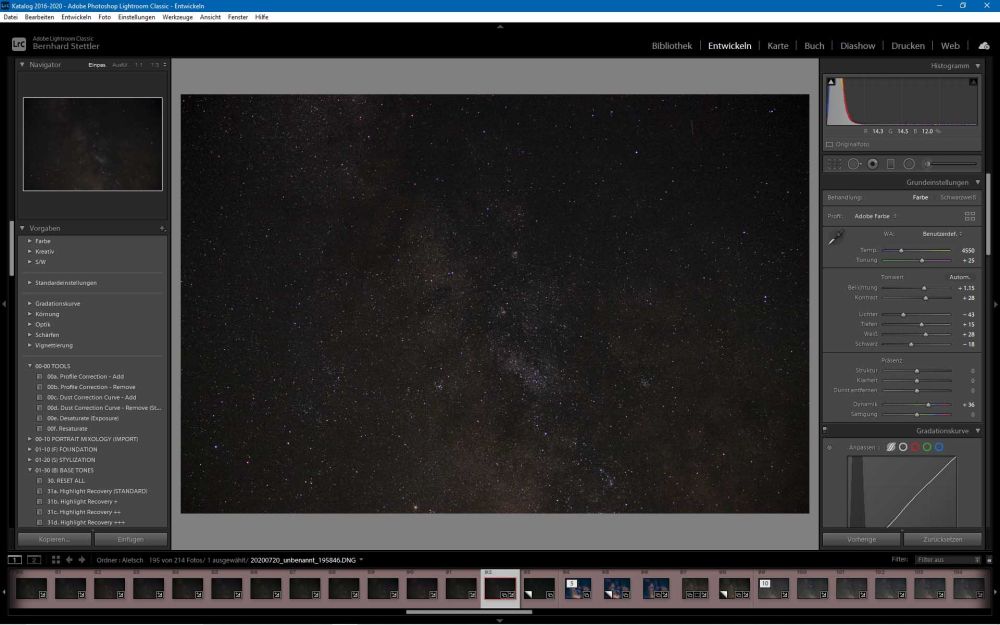
After I have taken the pictures, I import them into Lightroom. I group the image sequences in a stack. To edit the images all the same, I activate Automatic Synchronization in Edit Mode. Here I now make the first adjustments. These adjustments are all global. Depending on the settings I also remove the vignetting of the lens. However, this can lead to problems afterwards as the vignetting correction can lead to banding in certain cases. In such cases I deactivate the vignetting correction.
Stack the star images
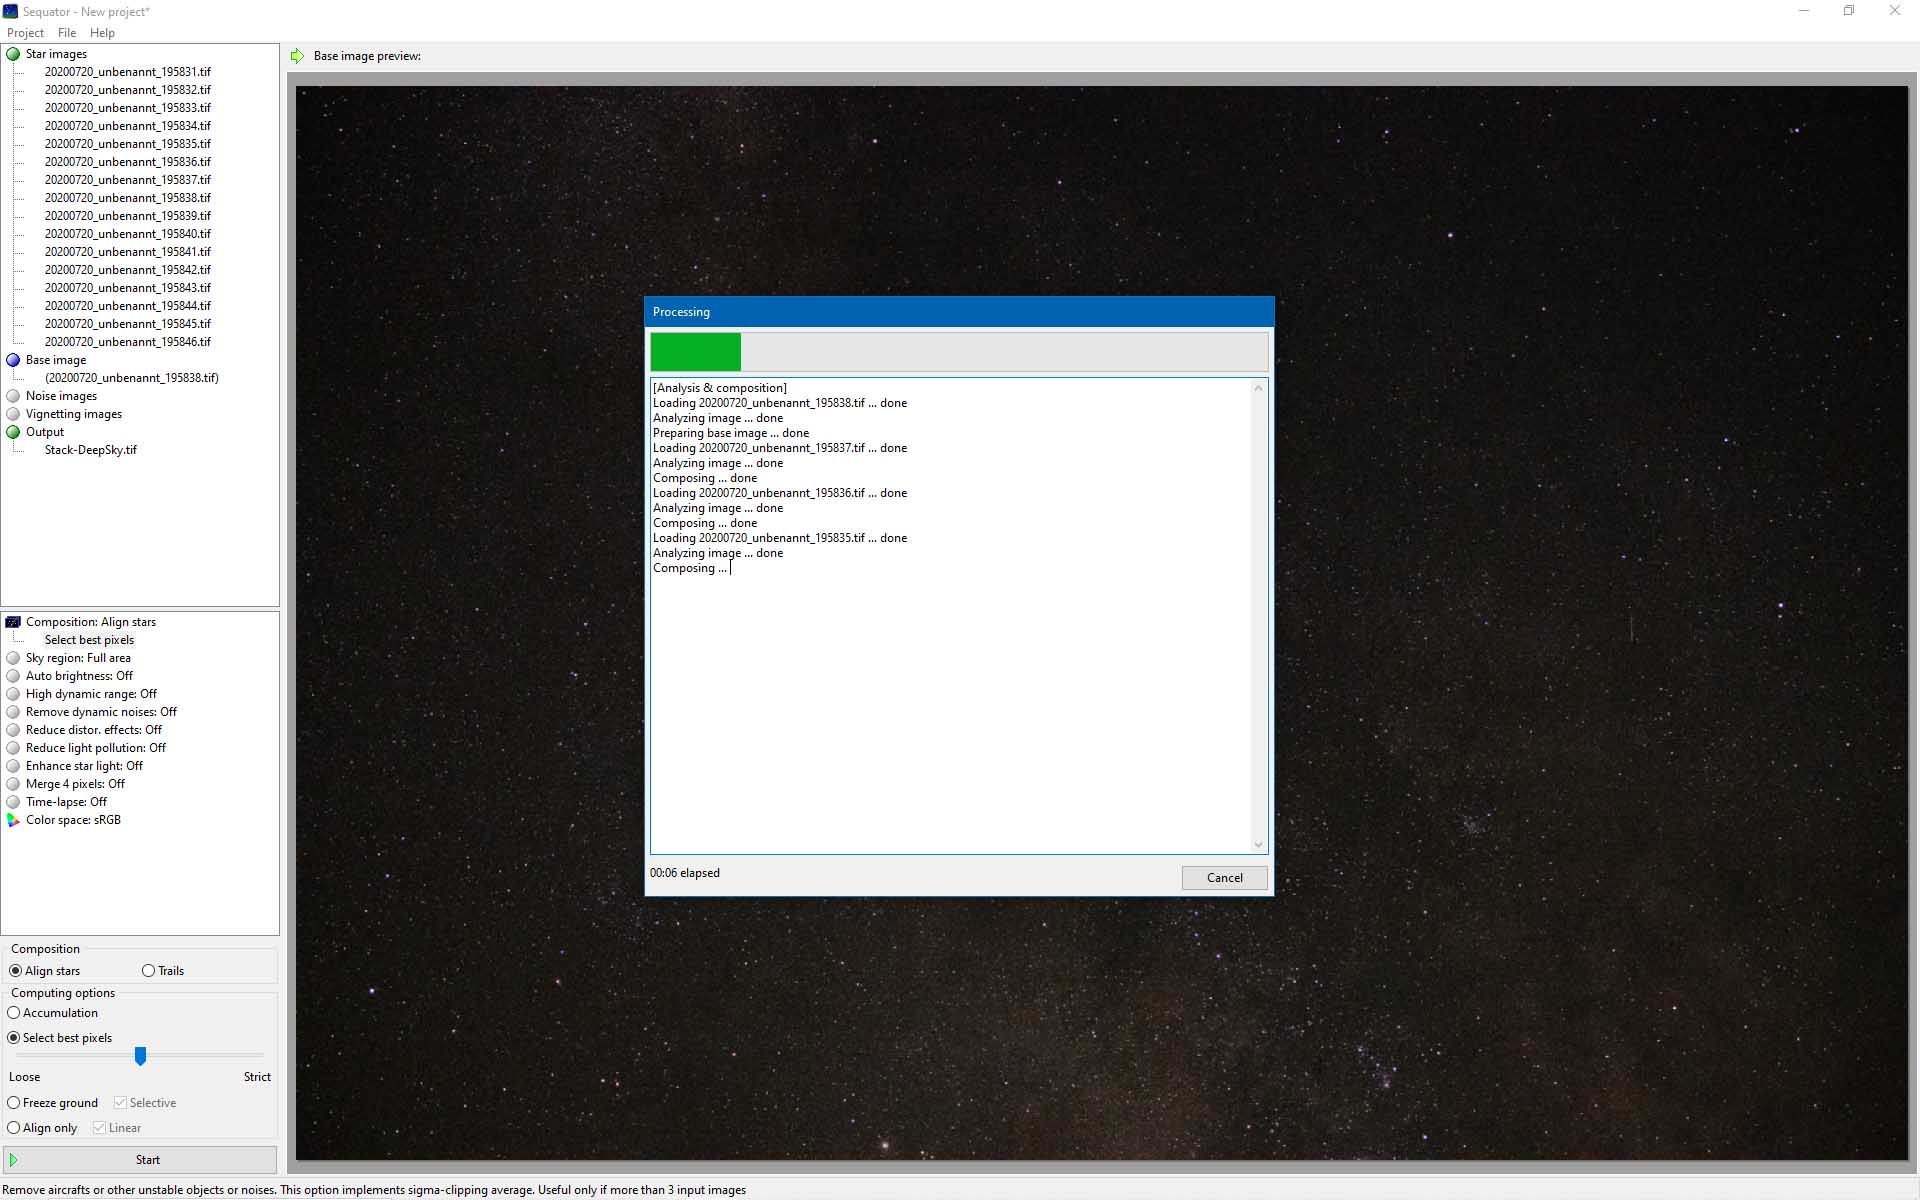
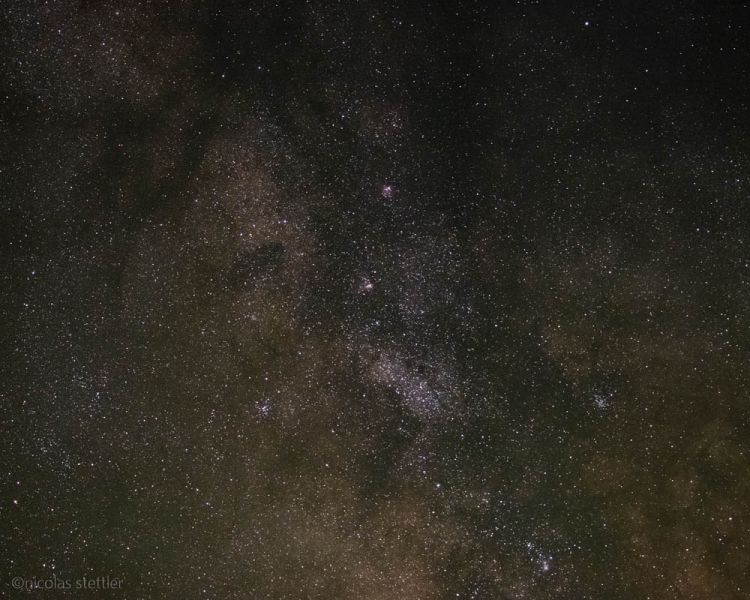
Then I open the program Sequator and load my images into it. Sequator is a free software. Nevertheless the program works much better than e.g. Photoshop. It could stack the images of the milky way with Photoshop, but especially with wide angle lenses Photoshop has extreme difficulties. What takes a good half hour in Photoshop, Sequator calculates in less than 2 minutes. And in even better quality.
There are no real alternatives to Sequator. Other programs are usually extremely complicated and difficult to use. Sequator, on the other hand, works very easily and is easy to understand. Nevertheless, Sequator offers everything you could possibly need for your photos. Now let's talk about how you use the program.
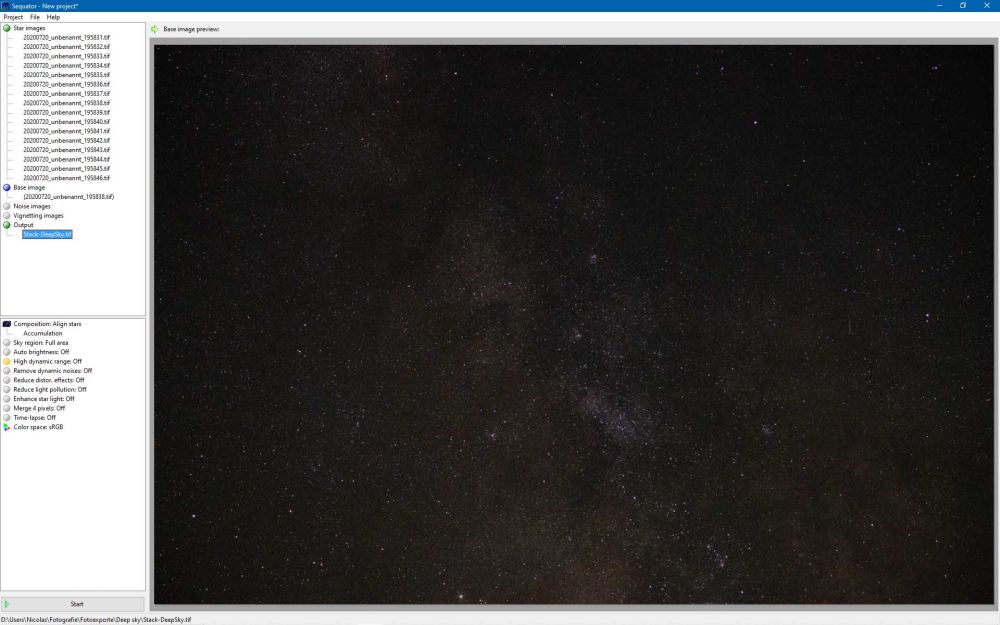
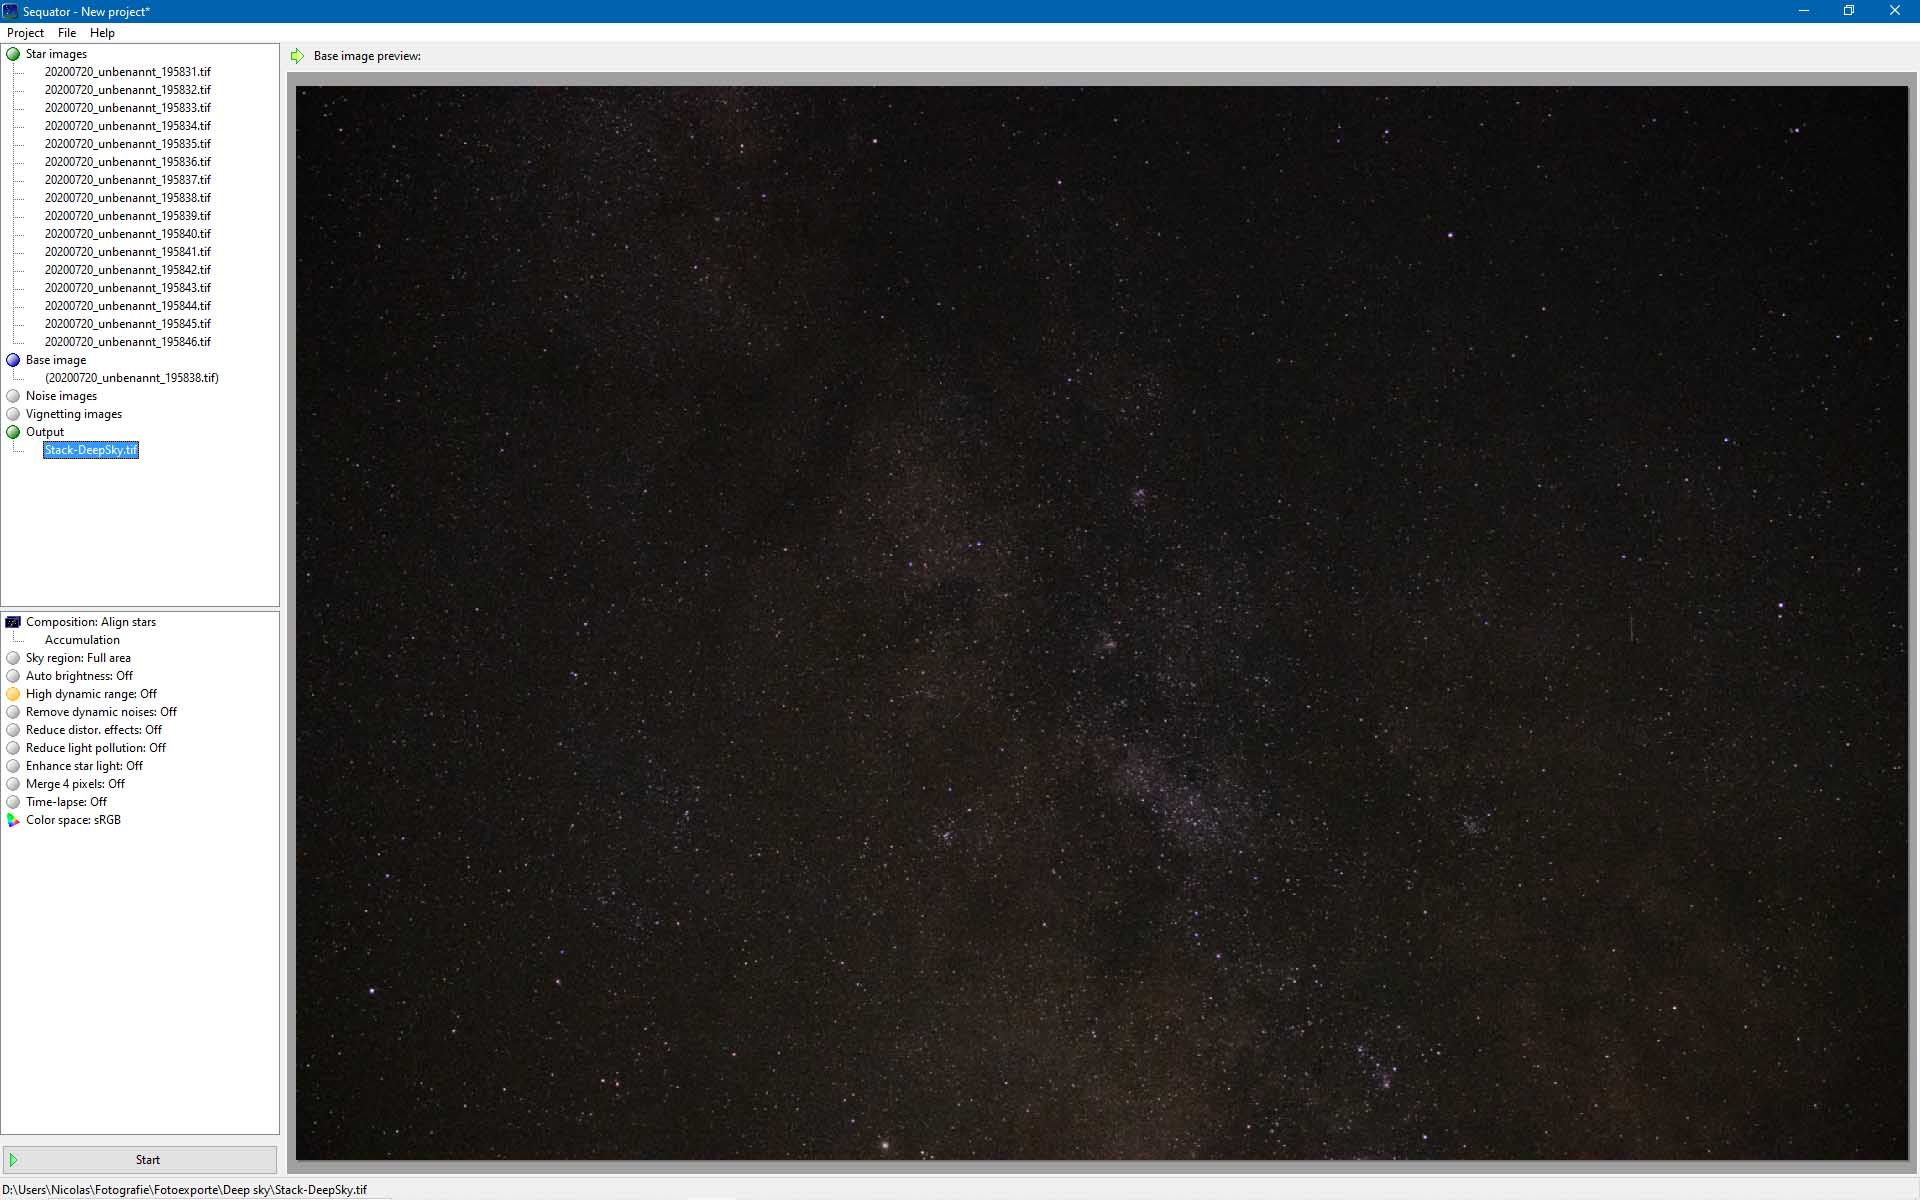
Double click on Star Images to open the file manager. Select your image sequence.
Then double click on Output to set the file name and the location of the new file.
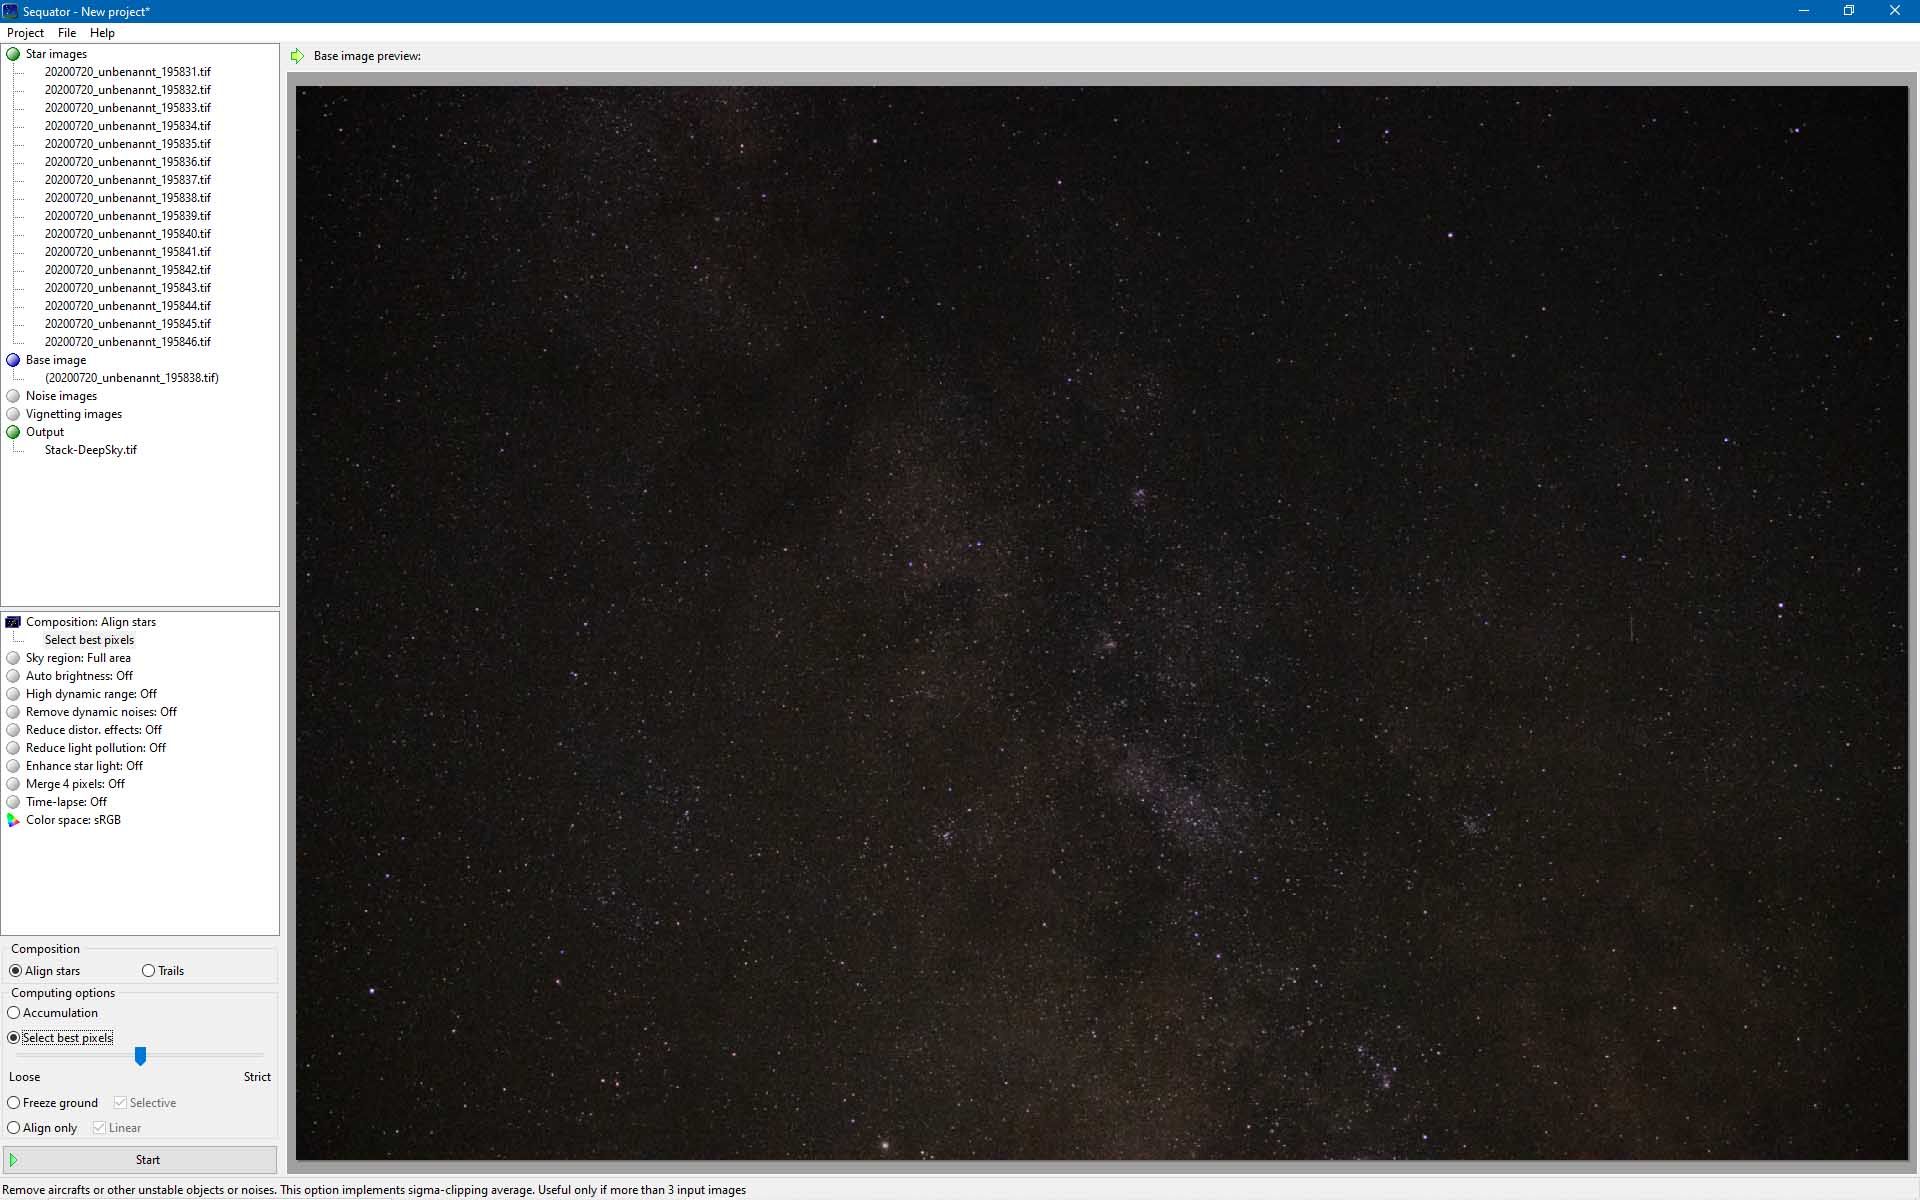
Afterwards go to Composition. Leave this on Align Stars. Below this box you can choose how the photos should be stacked. If you have a foreground in the image you must select the option Freeze ground. Without foreground, the option select best pixels worked best for me. Both Freeze ground and select best pixels will automatically remove all trails from airplanes aswell.
If your images have a foreground you have to mark it with Sky region. In most cases you will probably have an uneven horizon. The Irregular Mask works best for this. This works similar to Photoshop. You can now paint over the entire starry sky. But you should be careful not to mark from the foreground. The green area will be registered as the sky. If you make a mistake and also mark the landscape you can erase the mistake by holding down the Alt key.
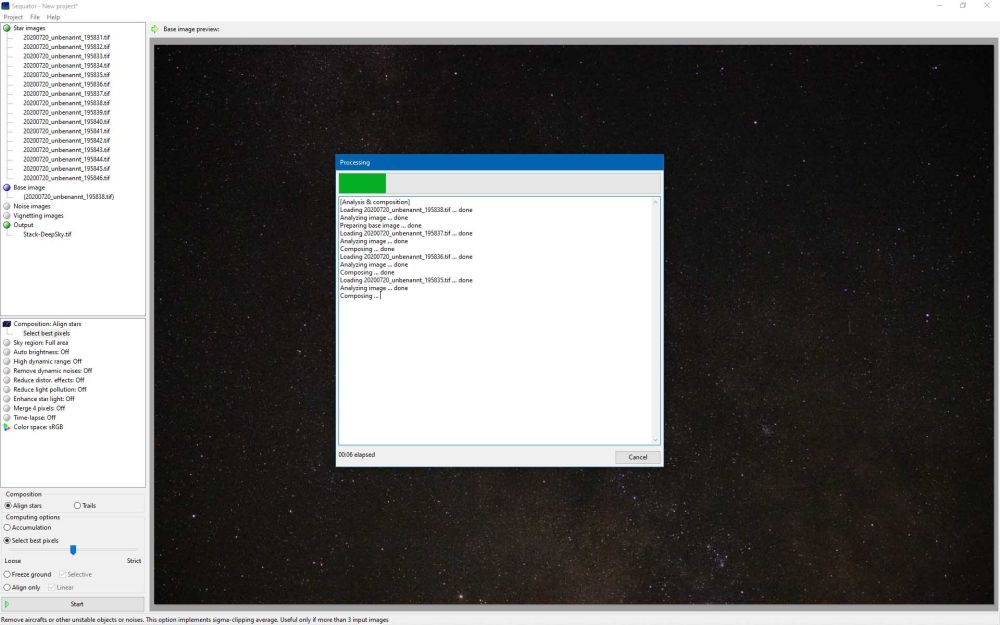
Now everything is prepared and you can let the program do its job. Therefore, click on Start.
After the program has finished calculating, you can close the loading bar and view the finished image.
The image is already saved automatically and you can now import it back into Lightroom. There you can make further adjustments or open the image directly in Photoshop.
Edit the images in Photoshop
In Photoshop it is now a matter of getting the most out of the existing data.
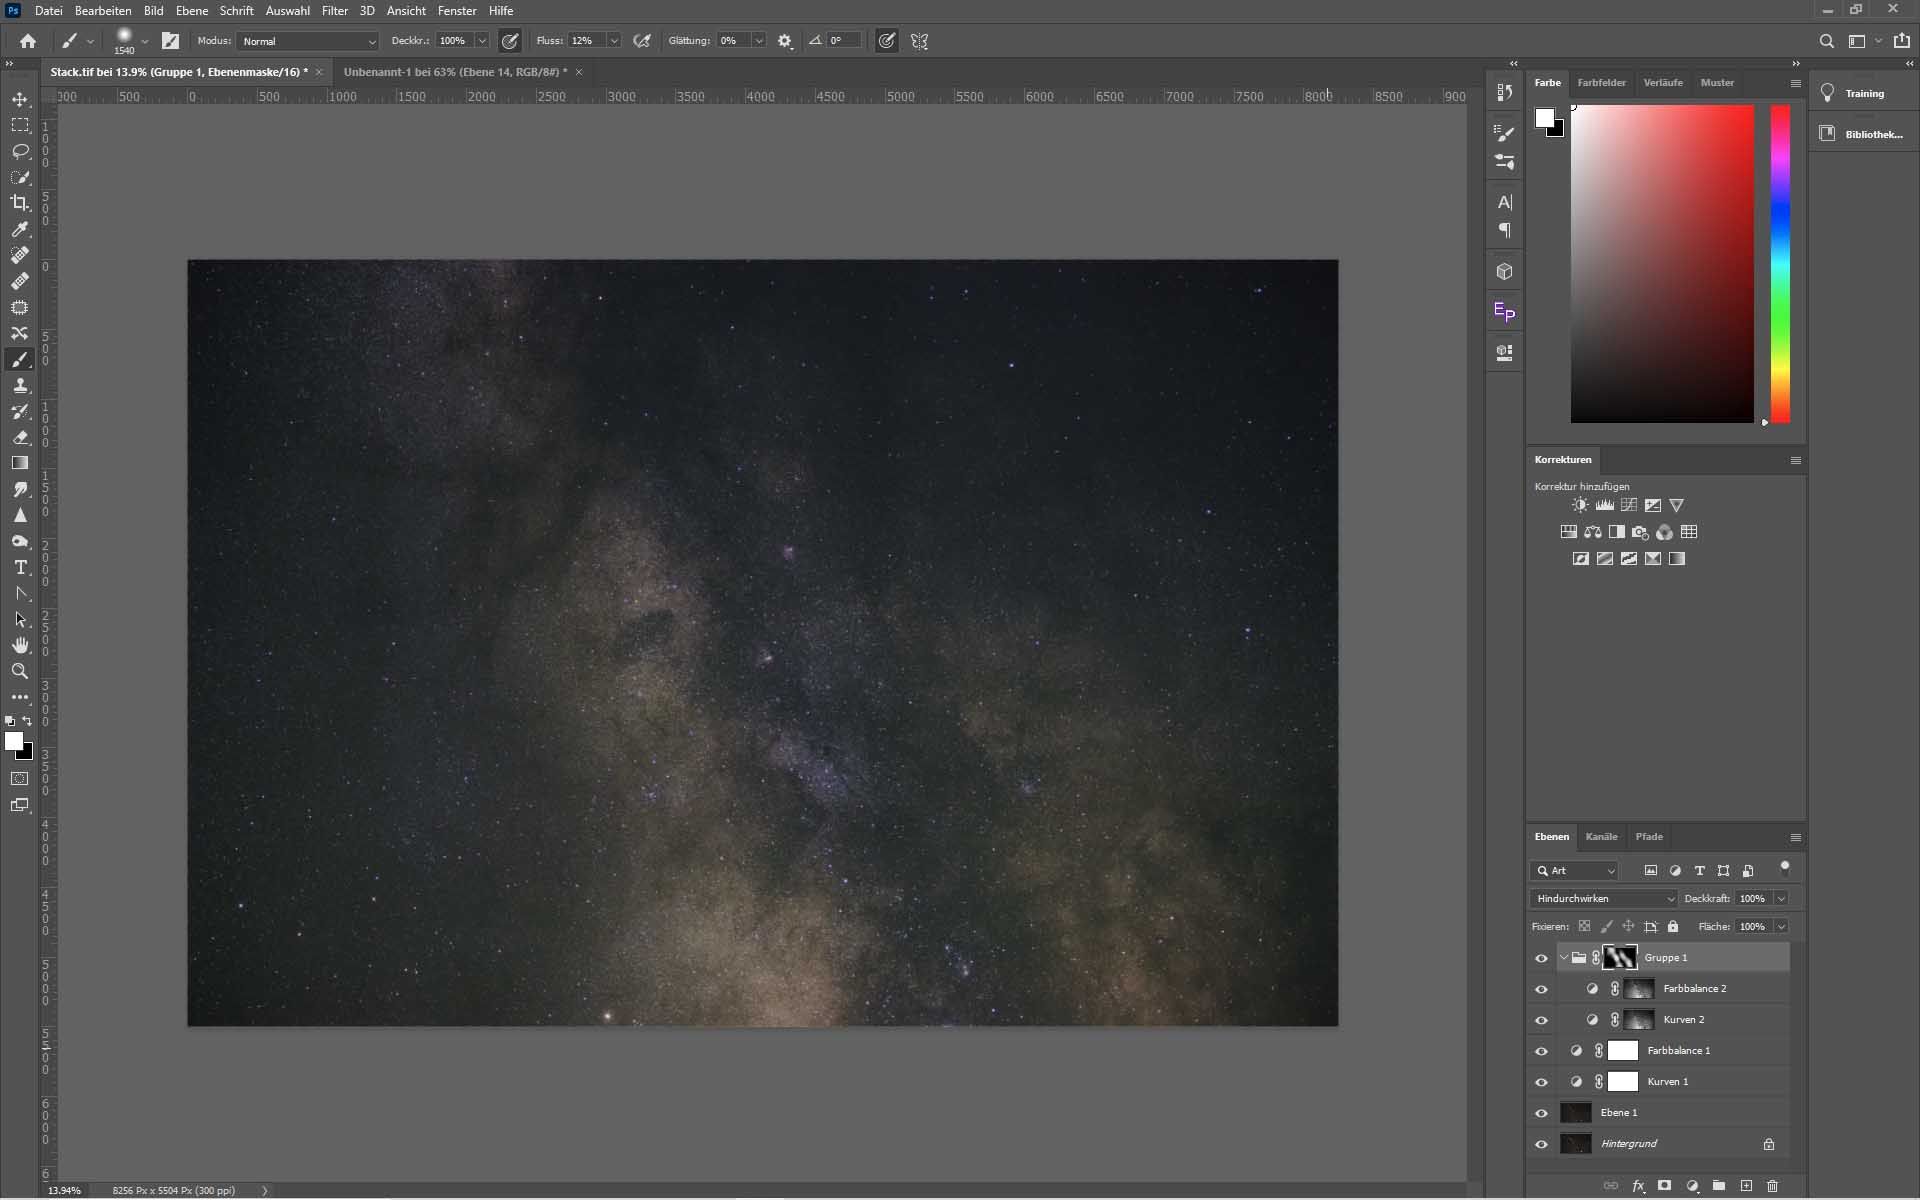
First of all, I recommend to decrease the brightness of the stars a bit. That sounds a bit counterproductive at first. But you want to emphasize the nebulous structures and not the already very bright stars. By darkening the bright stars the nebulae become a bit more prominent.
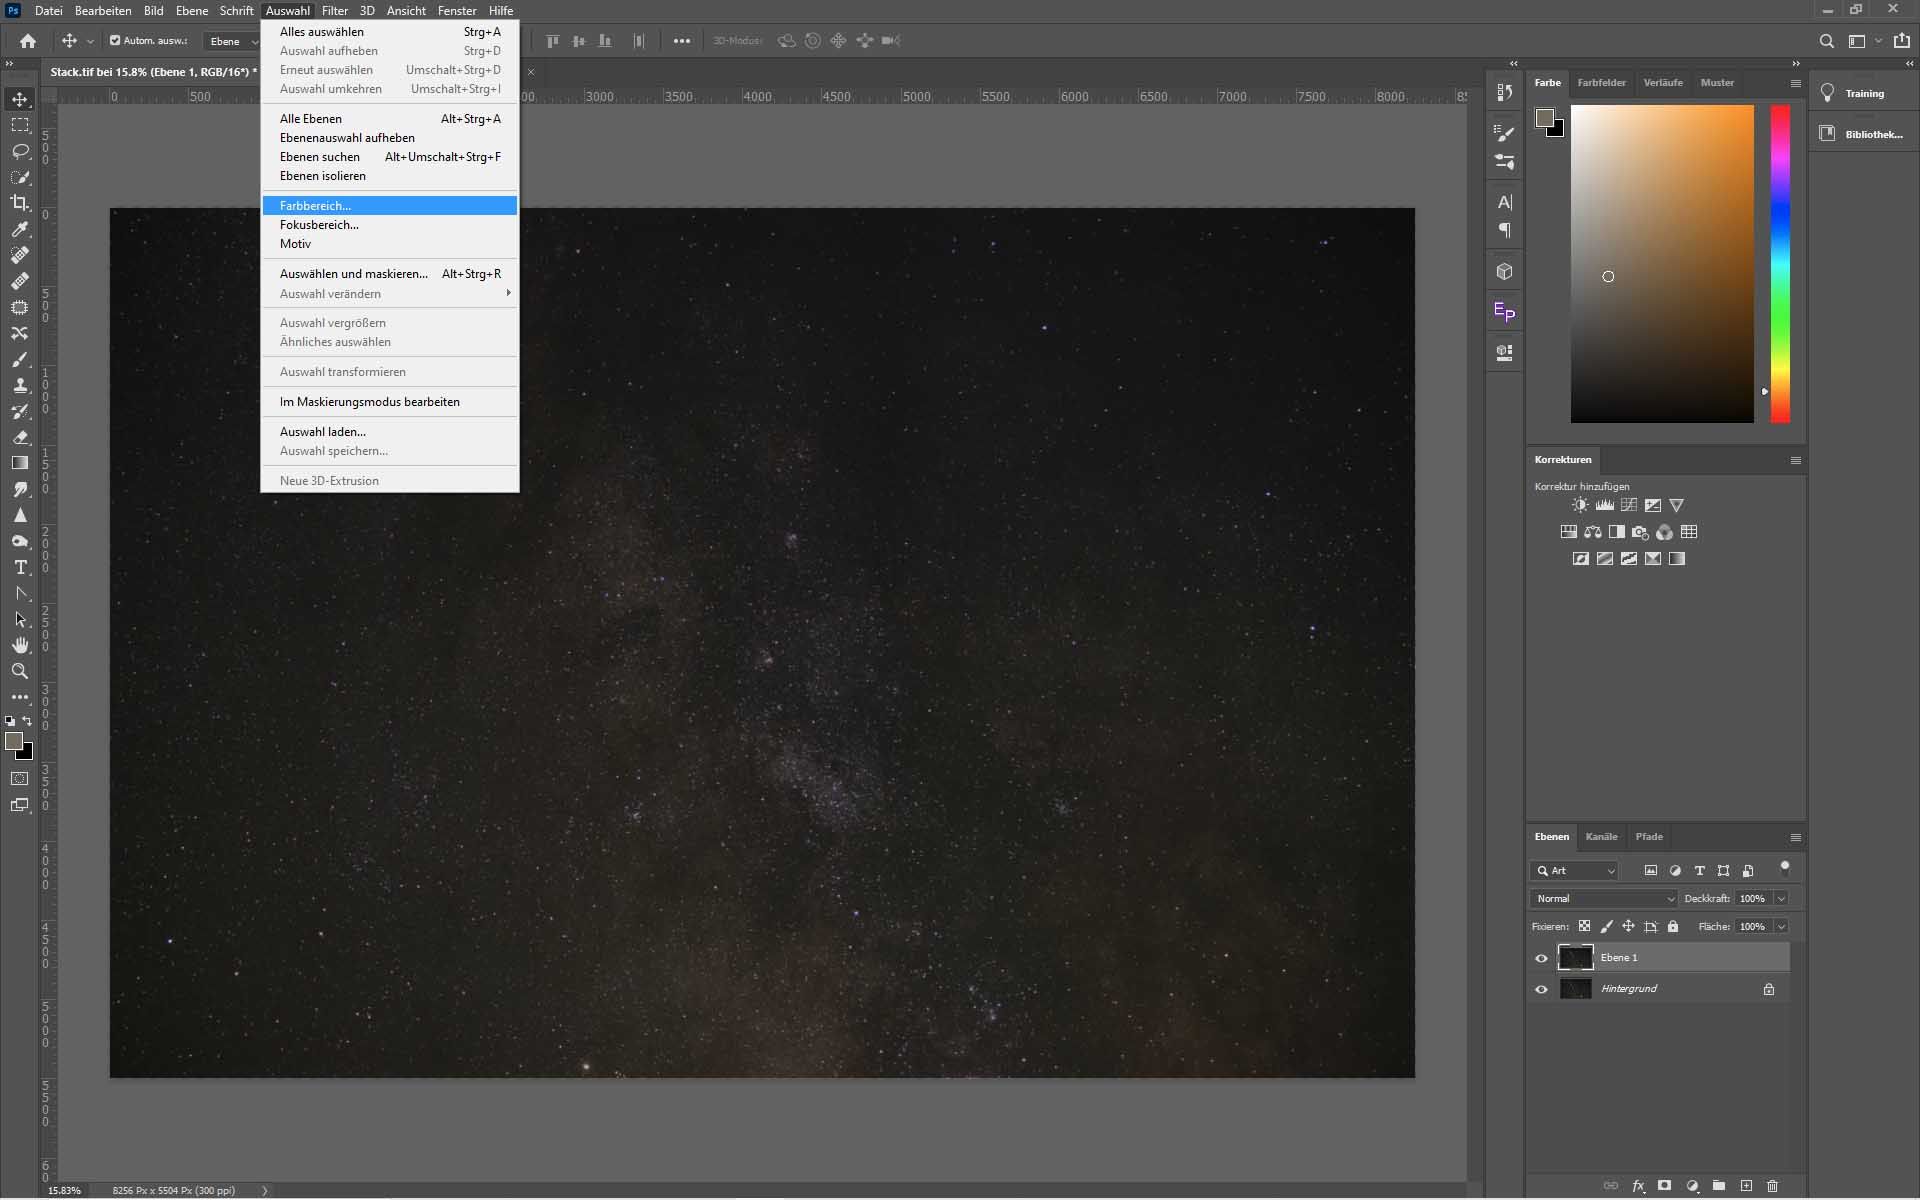
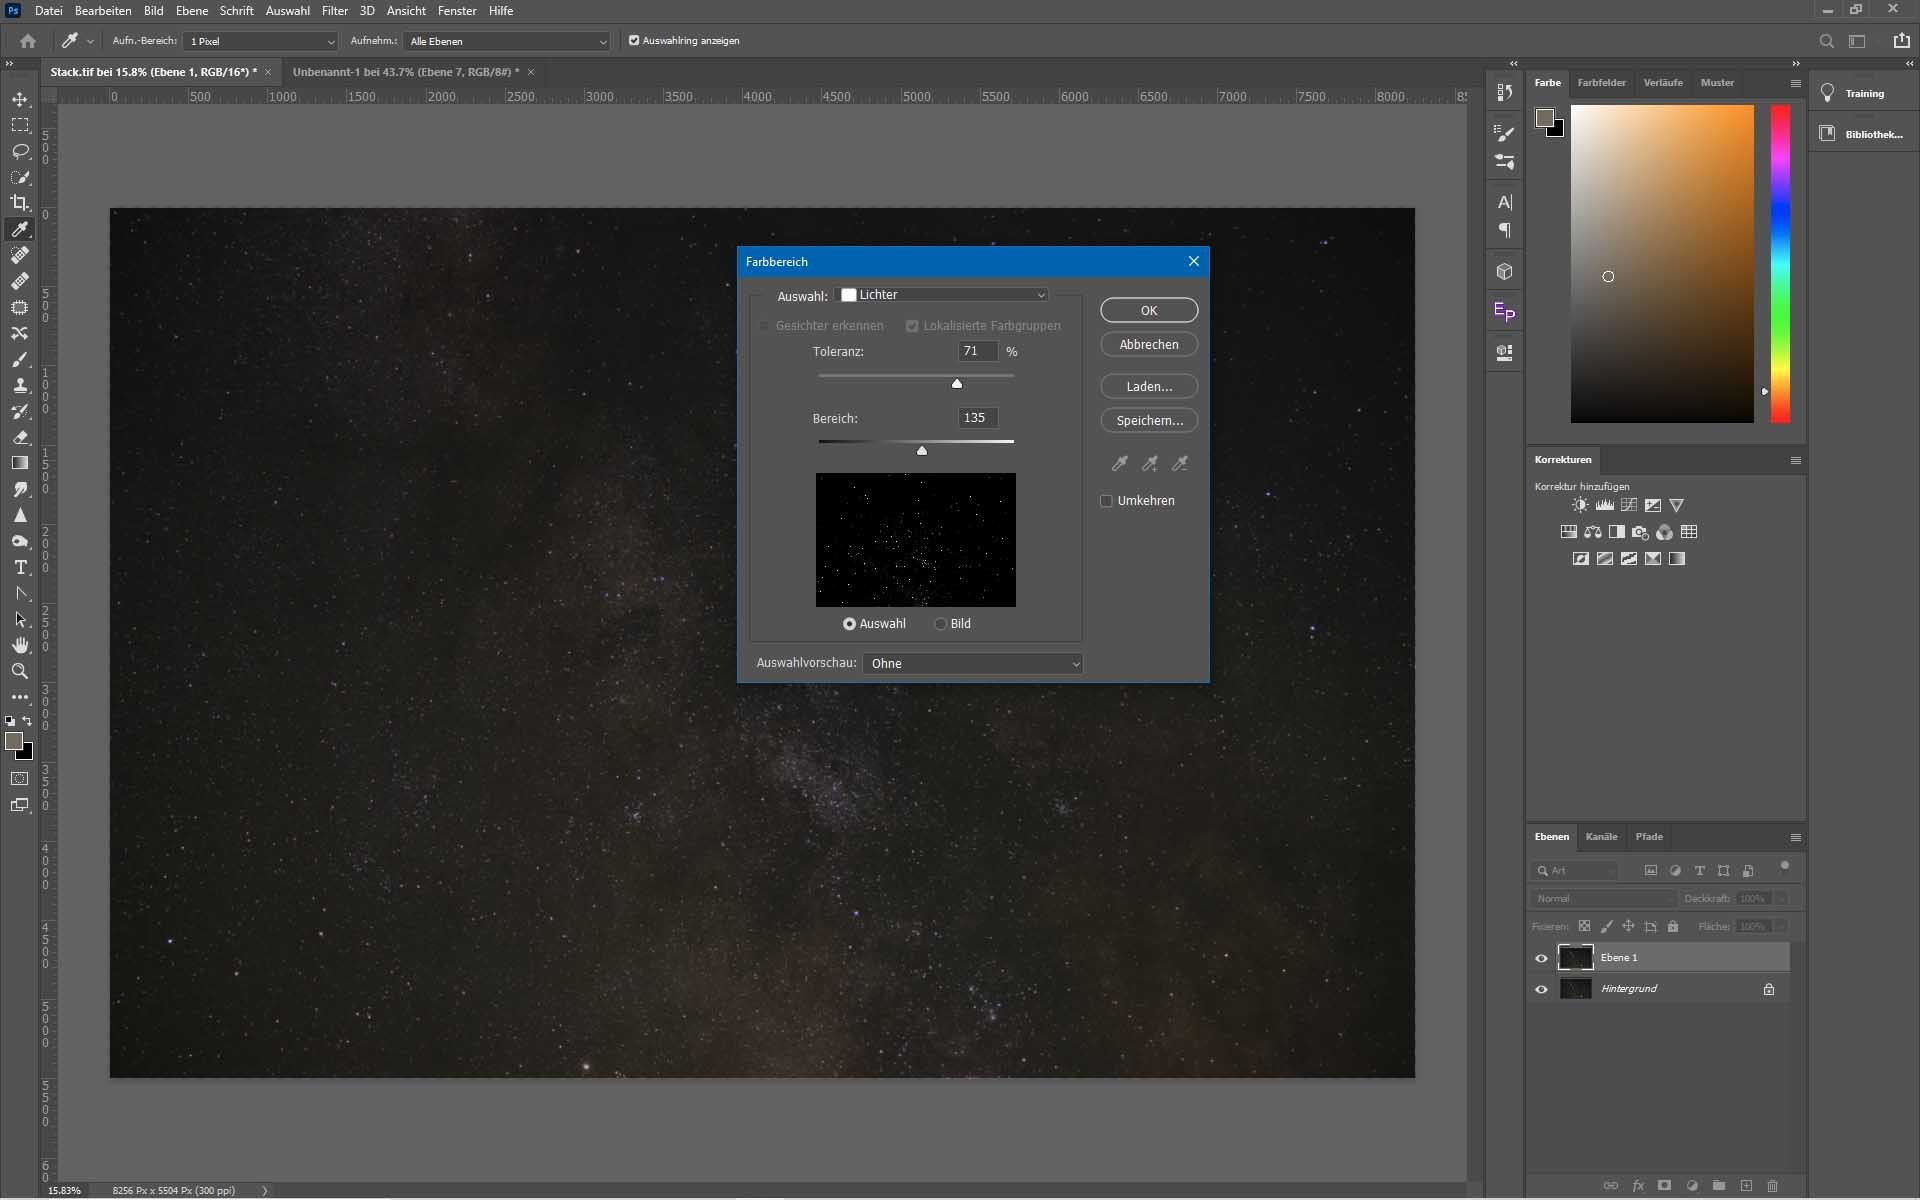
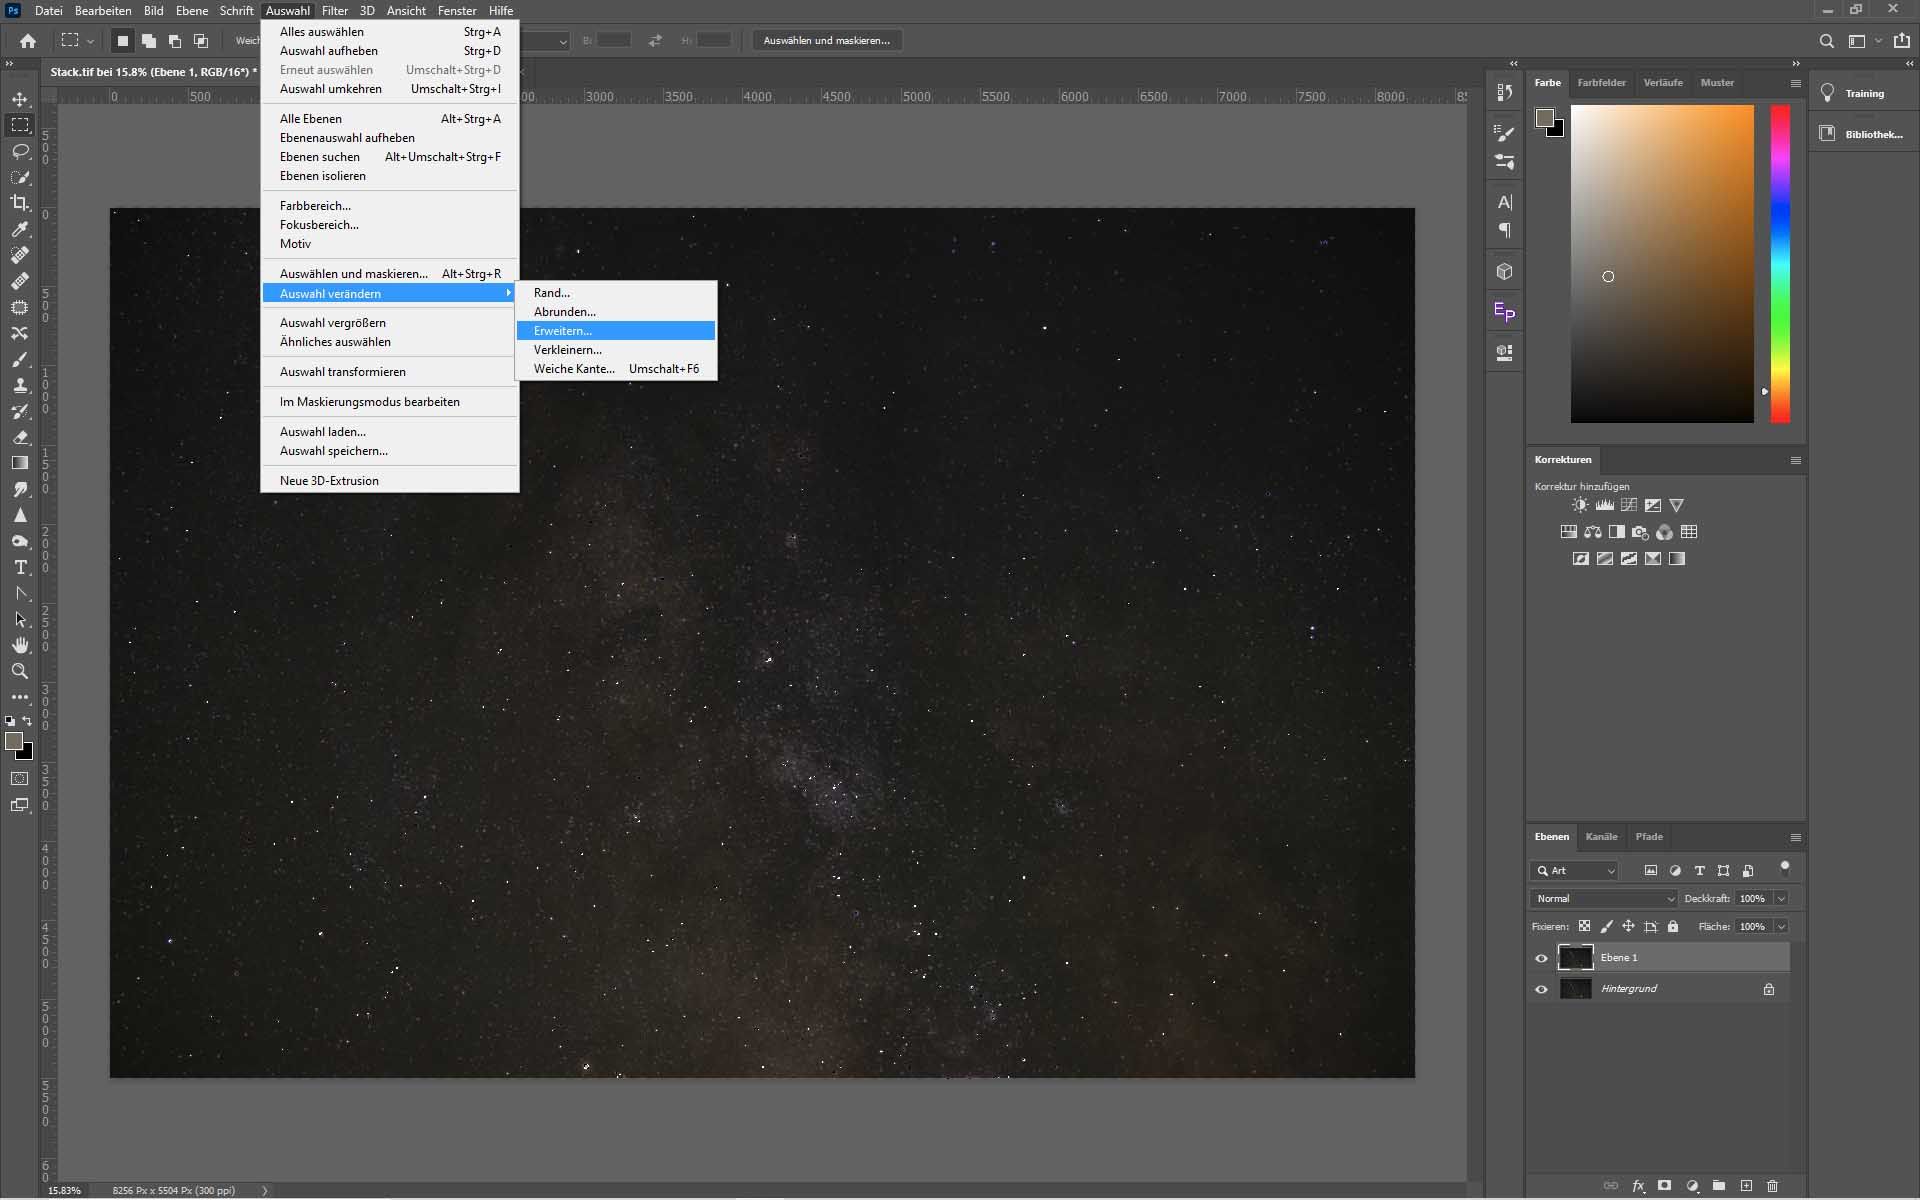
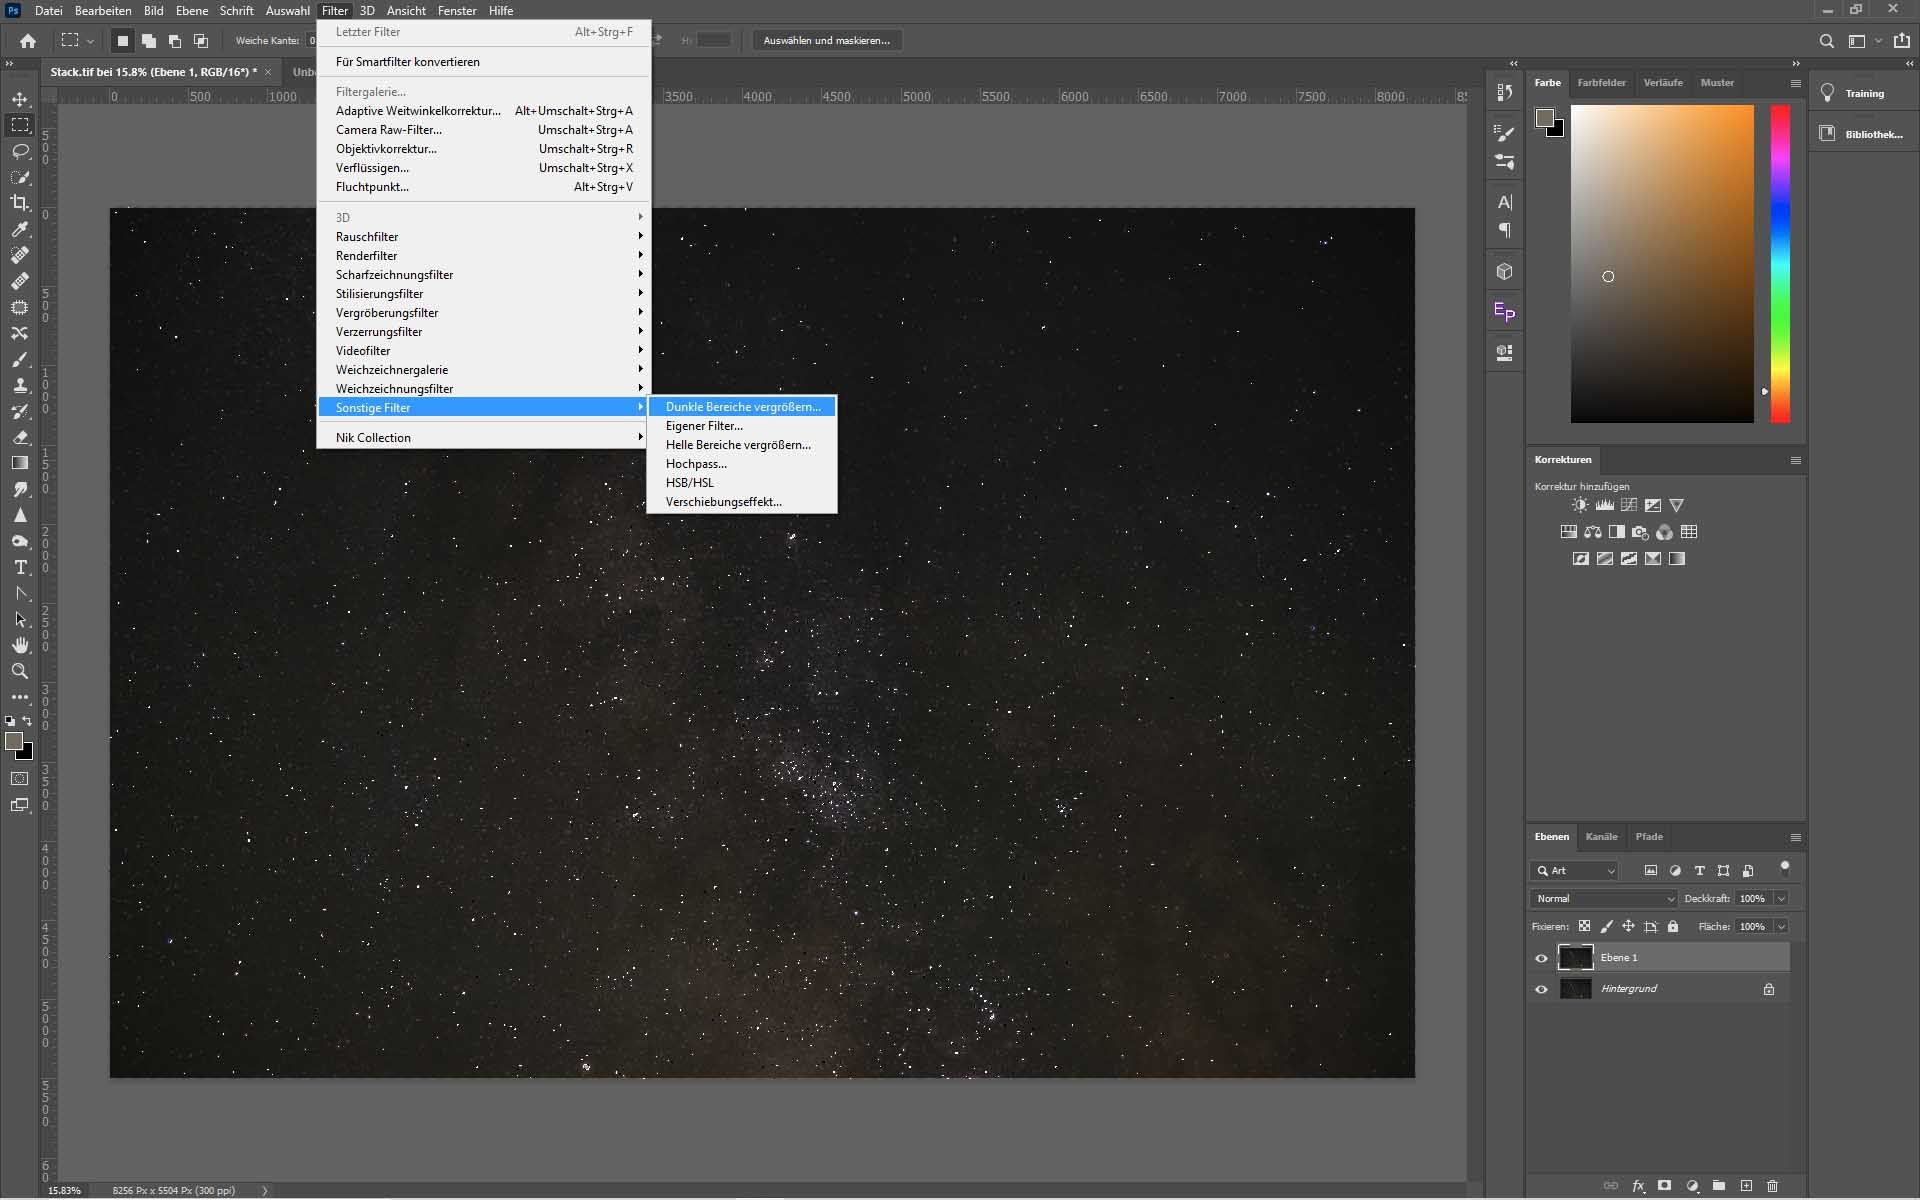
First duplicate your photo with Ctrl + J. Then go to Selection > Colour Range. In the new window set the selection to Lights and play with the two sliders until only the bright stars are marked white. Now you can click on OK. Then go back to Selection and click under Change Selection on Expand. In the new window set the slider to 2 px. Again under Change selection choose Soft edge and set the slider to 1 px. Now you can darken the stars under Filter > other filters > darken dark areas. Play with the slider until you like the results. Generally values between 1 and 2 px work best. You should take care that you only darken the stars and that no strange artifacts are created.
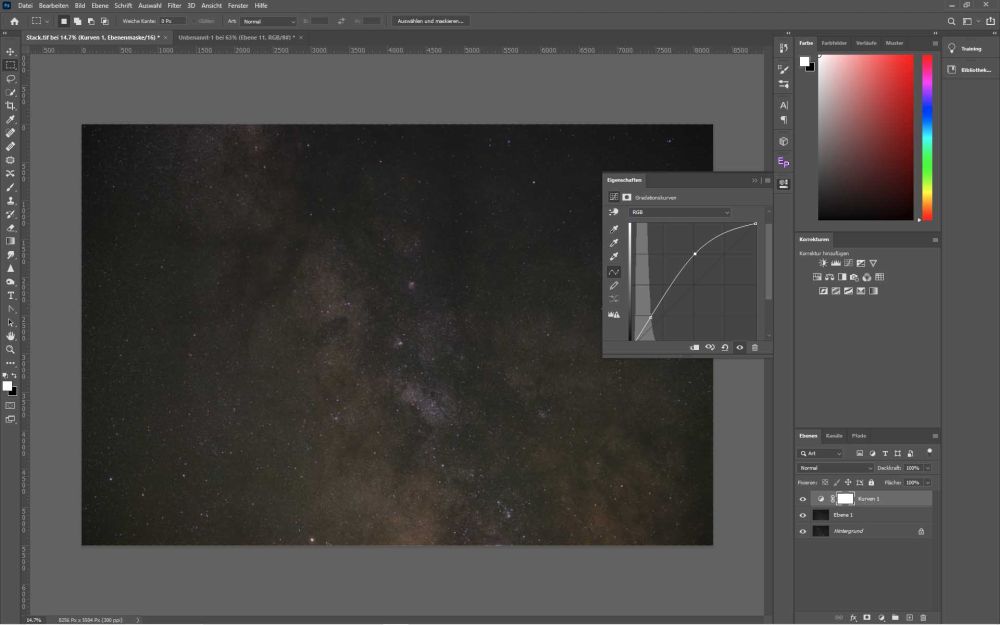
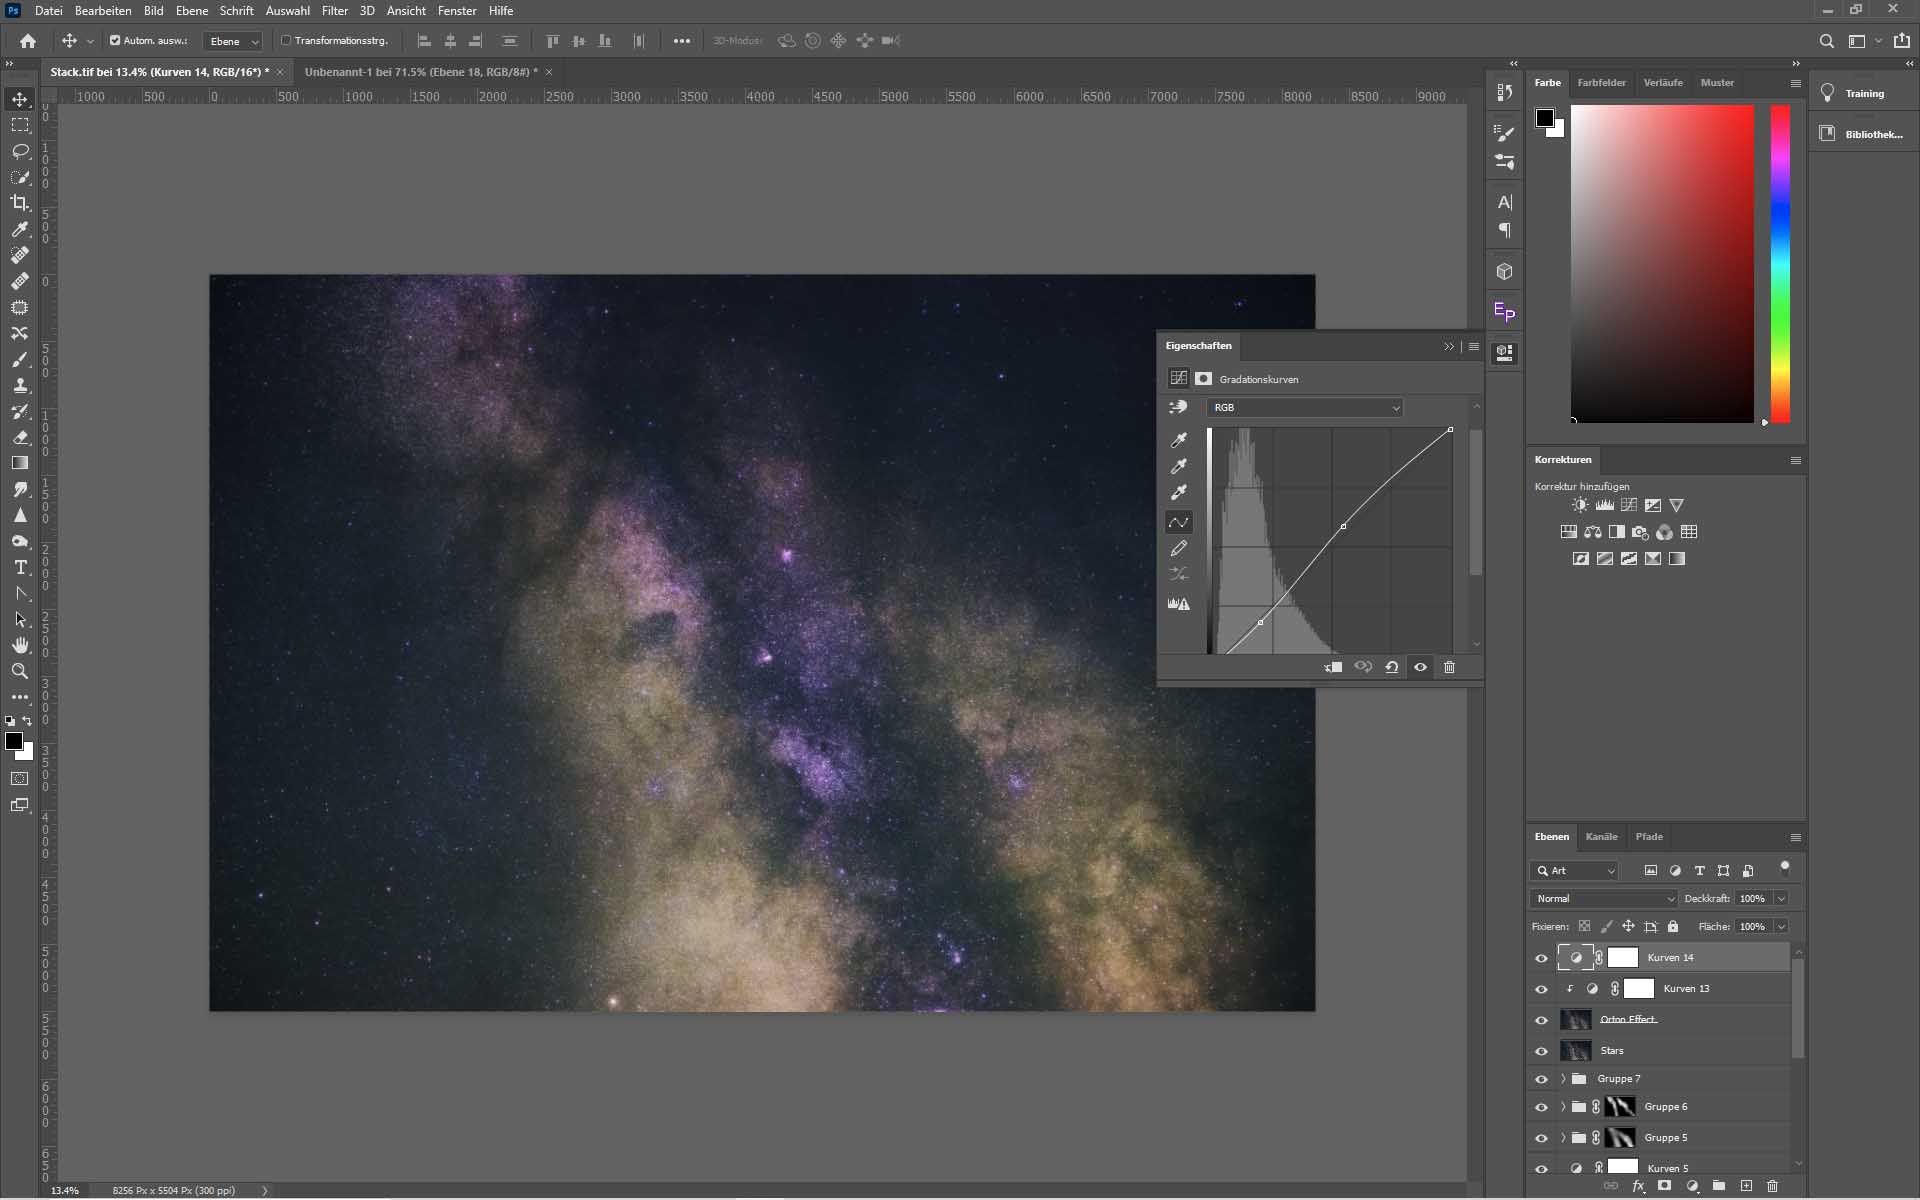
Now you can emphasize single areas of the milky way. With a curve adjustment you can brighten the nebulae a bit.
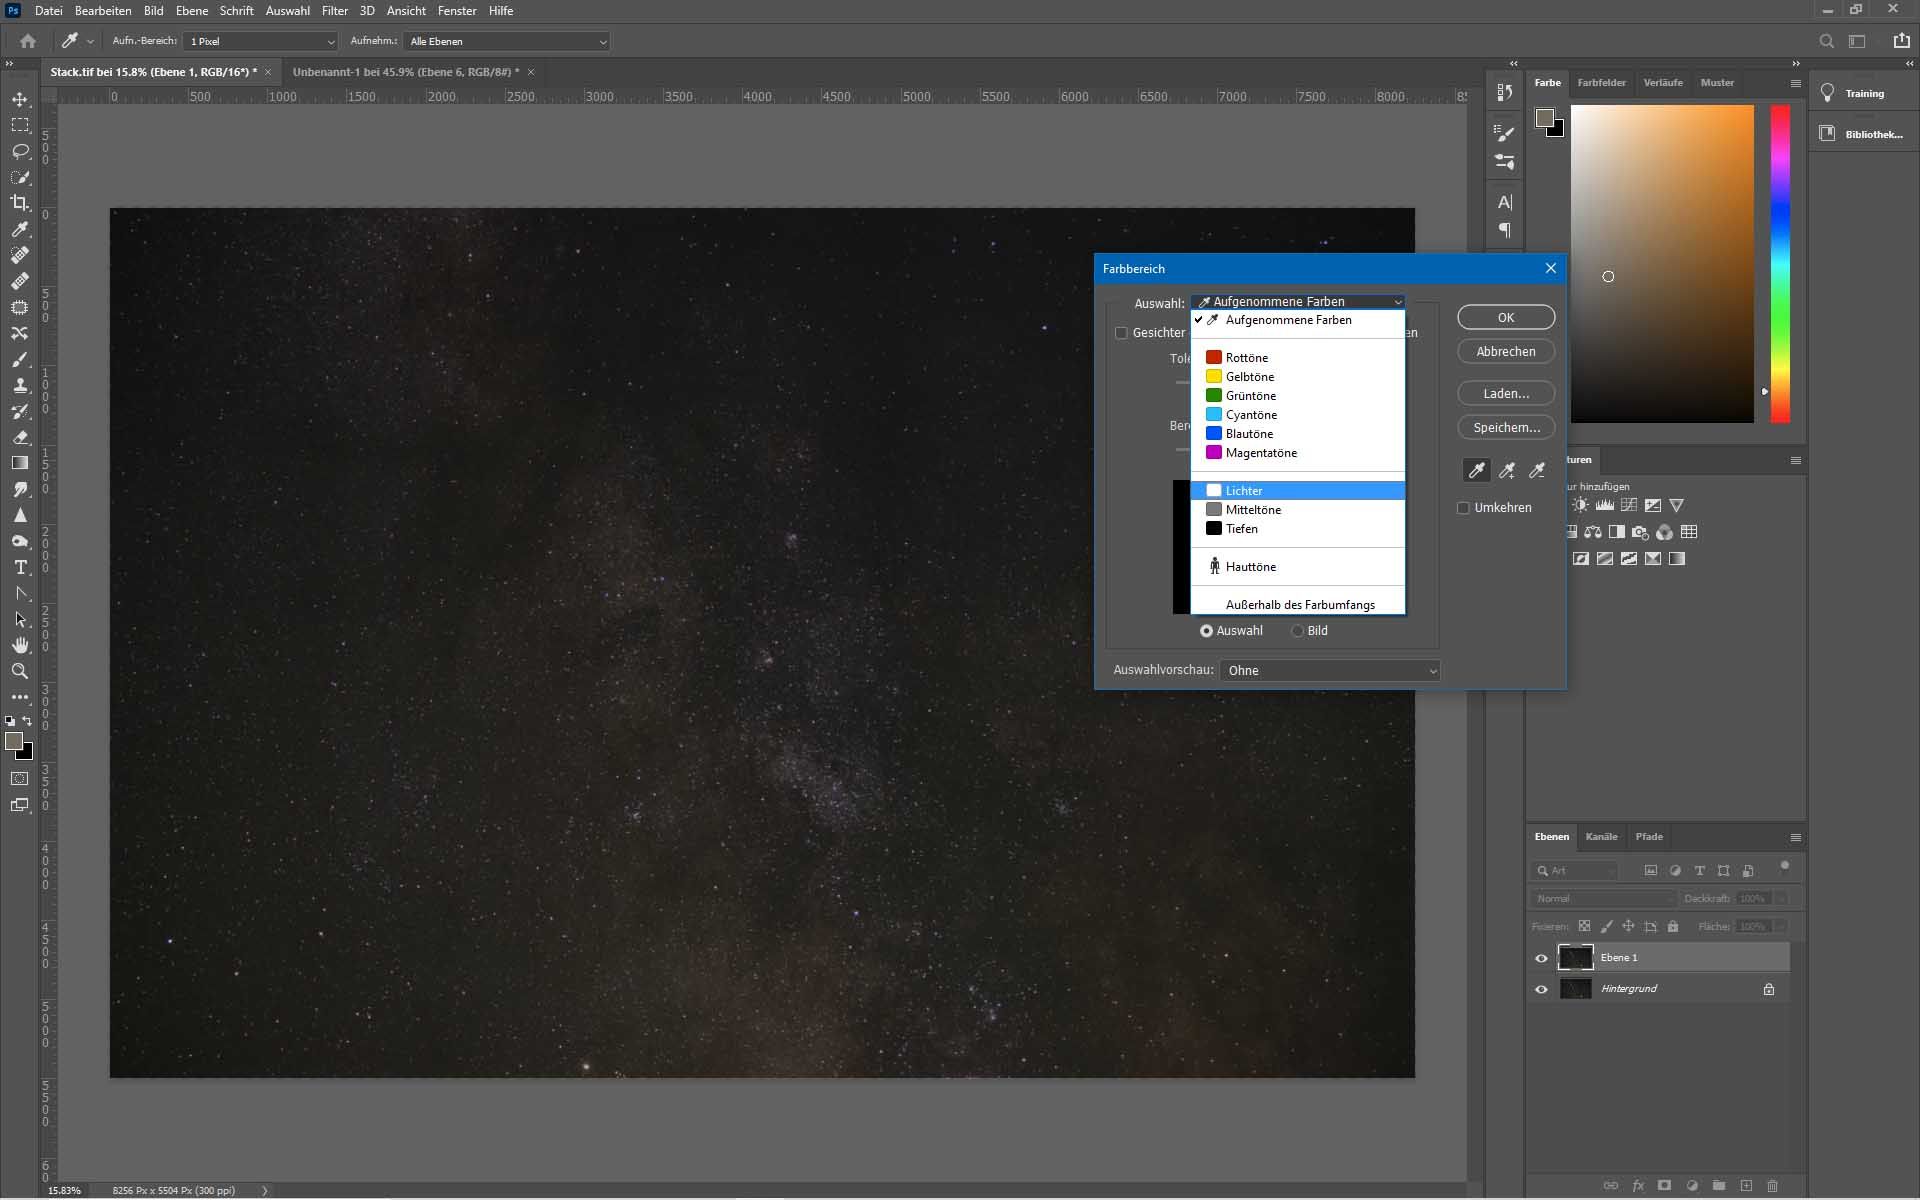
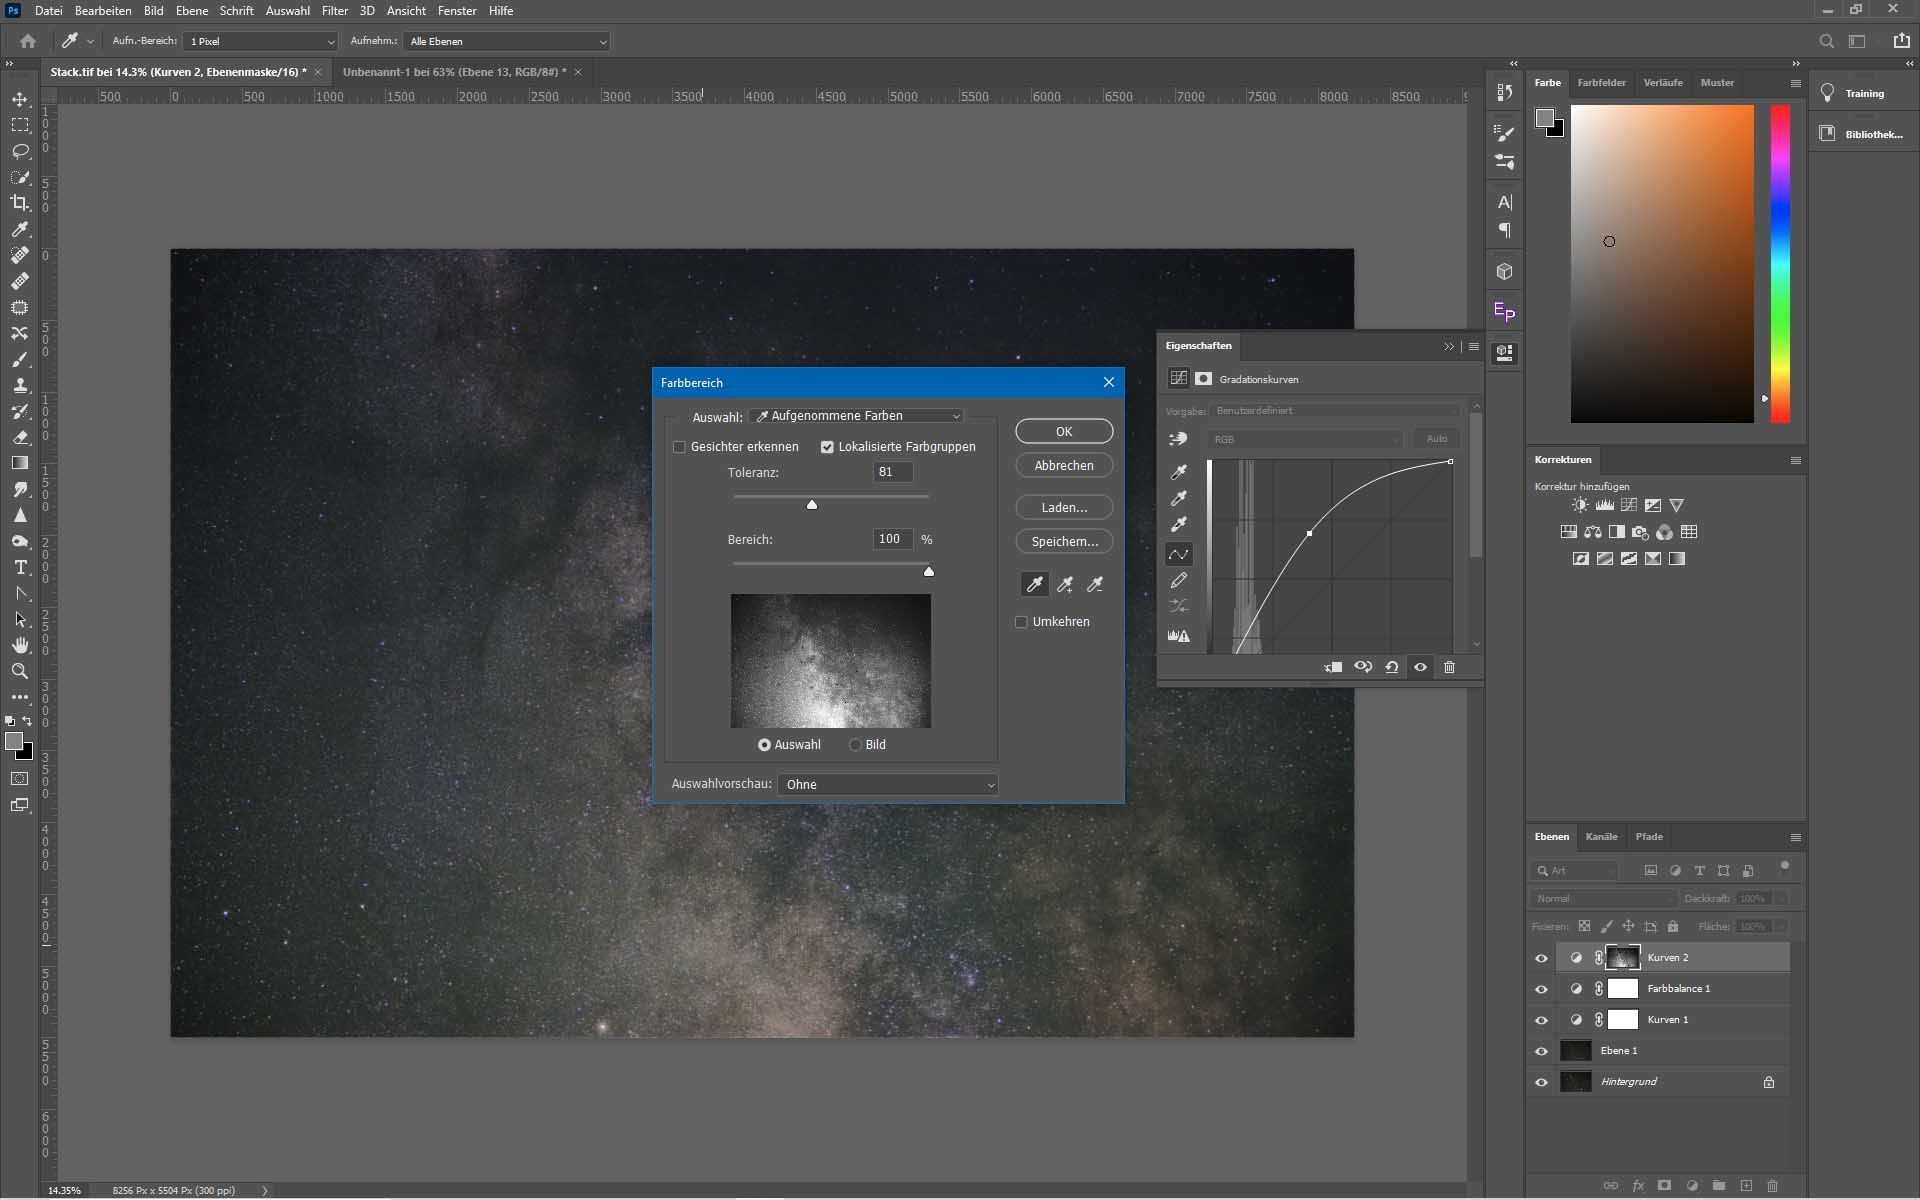
To make sure that the adjustments only affect the nebulae of the milky way, but the dark areas remain dark, you can select the nebulae under Selection > Colour Range. To do this, in the new window, set the selection to captured colours and then click on the area that you want to improve.
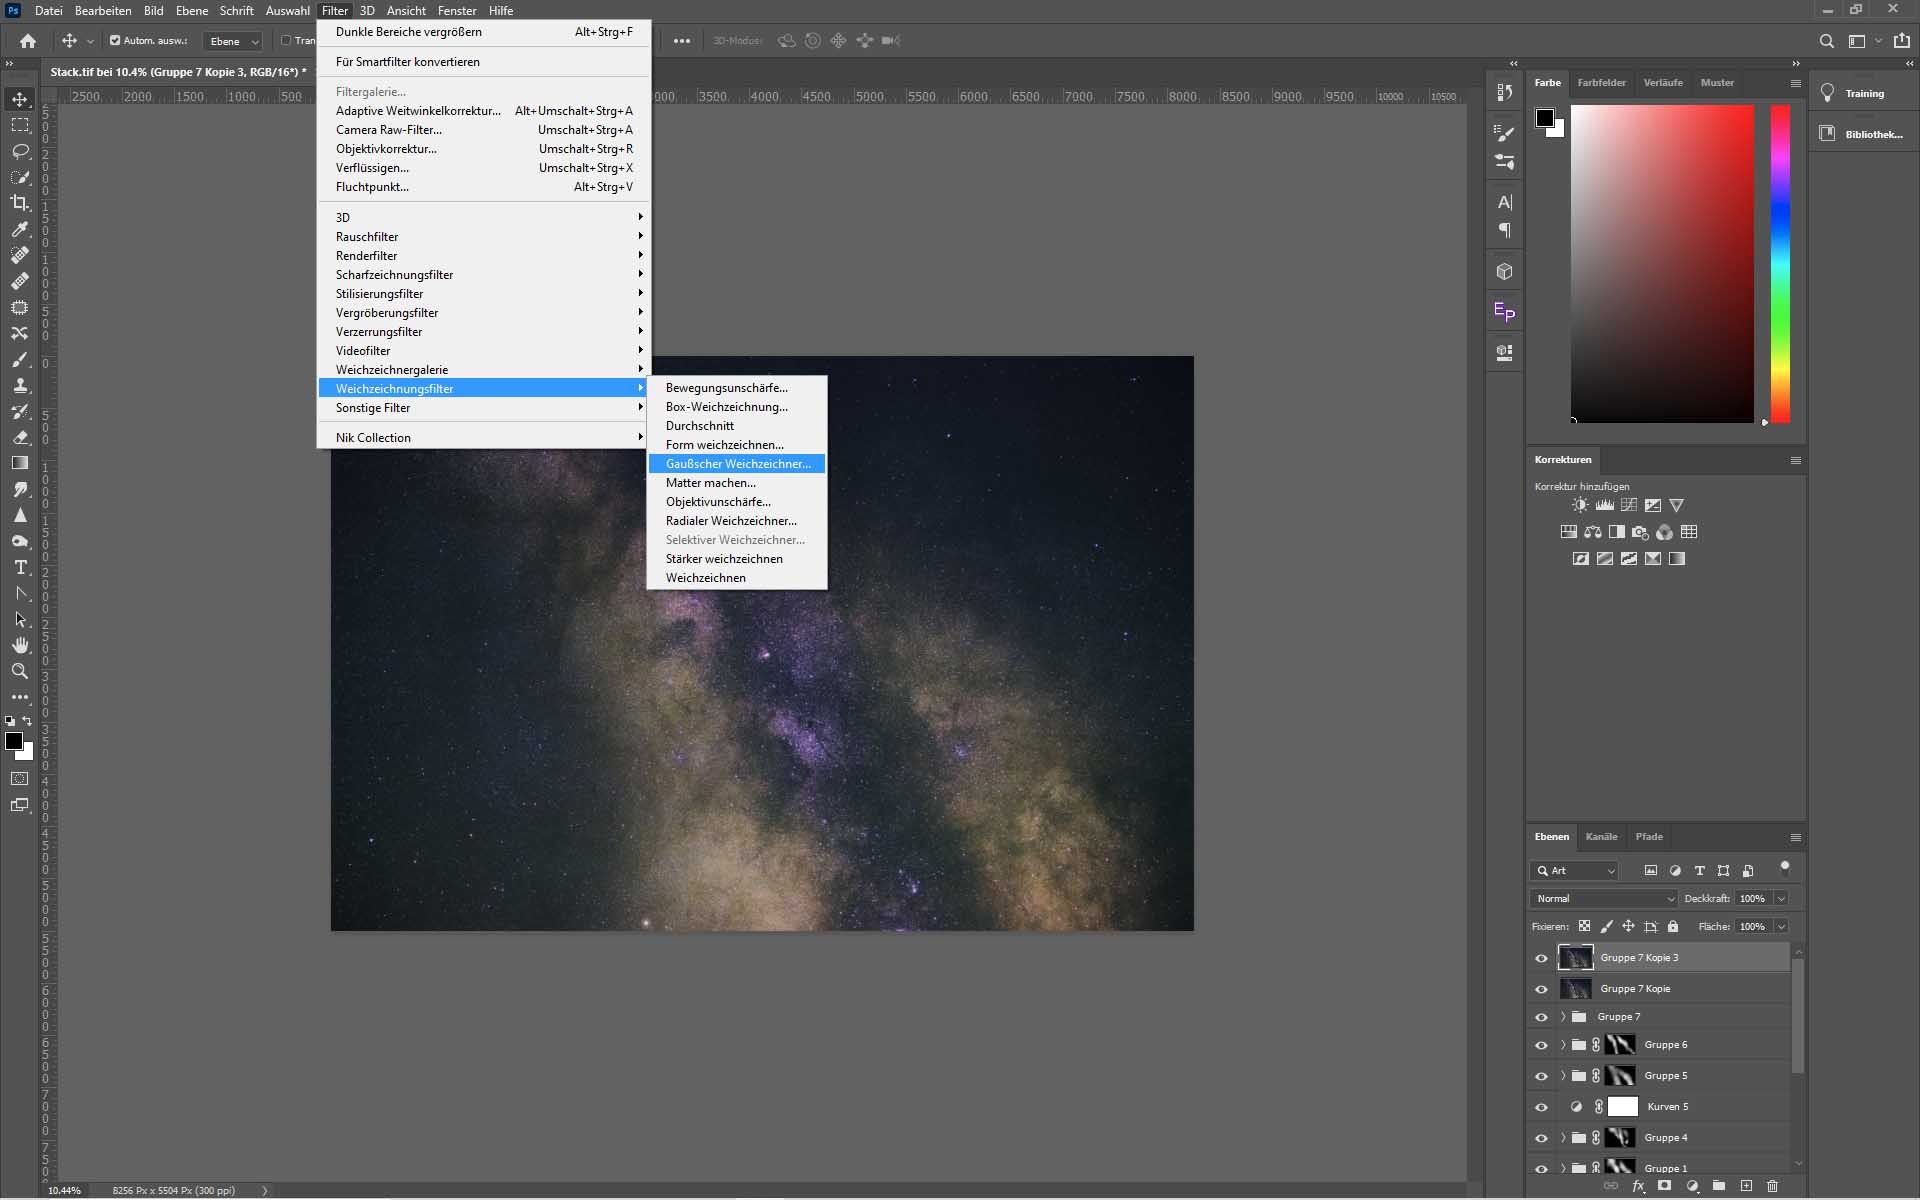
With the Orton effect you can improve the image of the Milky Way. The Orton effect places a blurred image over the sharp image. This gives the image a much softer look and makes the nebulae in the Milky Way look even better. For the Orton effect you first have to copy all layers with Ctrl + J. By right-clicking on the layers you should reduce the copied layers to one layer. Now set the opacity of this layer to about 20% and then paste the filter Gaussian Blur onto the layer.
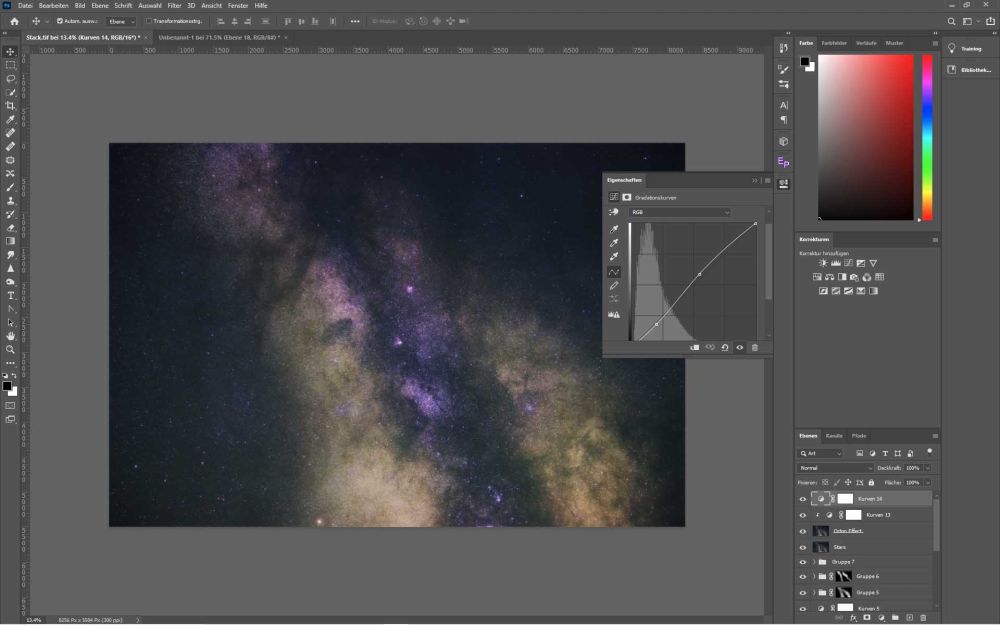
Play with the slider a bit until you find a value you like. If necessary, you can adjust the opacity a bit. The Orton effect also reduces the contrast a bit. With another curve adjustment you can bring more contrast into the picture.
Depending on your needs, you can use a plugin or Adobe's internal noise reduction to remove noise. But in most cases this is not necessary.
If you have a foreground you have to make the adjustments for the starry sky and the foreground separately. For this purpose I would group the respective adjustments. You can then create a layer mask for both groups.
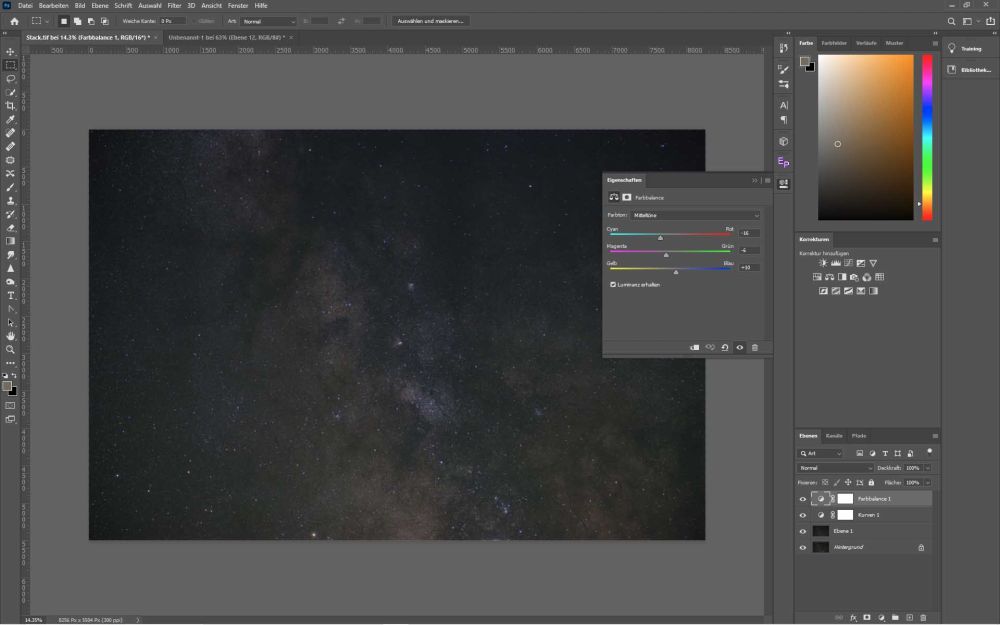
Now the photo is finished. How you finally edit your photos of the milky way is entirely up to you. Especially in Photoshop there are endless possibilities. There are also many different ways in which you can apply some adjustments. Editing photos in Photoshop does need a bit of creativity to use the possibilities the program offers.

You might also find interesting:
Bird Photography - Create impressive images
Photographing birds can be very difficult. In this article you will learn how to create impressive and unique pictures of birds. I explain what you should pay attention to when taking pictures and where you can find birds that you can easily photograph. Learn from my tips and tricks, which I myself have learned in the last years while photographing.
The 11 most common ducks in Switzerland
Many ducks overwinter here in Switzerland. But how can you identify them. In this article, I'll talk about the most common ducks in Switzerland. You'll learn where they live and how you can identify them.


